


ブログ - Raspberry Piカテゴリのエントリ
秋葉原で散歩していて,ふと,思い立って買ってみた.あきばおーで一本値下げされて150円.
値下げされているくらいだから,次に行った時は無いかもしれない.

USBメモリ風のLEDライトで,これを意図的に点灯できれば面白いのでは?なんて妄想してみてる.
まずは準備として,緑色のペイントマーカーで塗ったものを光らせてみた.

実際に塗った時の感覚よりは光った時の方が明るい.でもこの雑な感じがいい.
ペイントマーカーを買ったのは小学生の時以来かな.縁取りタイプが,すごく流行った.
値下げされているくらいだから,次に行った時は無いかもしれない.
USBメモリ風のLEDライトで,これを意図的に点灯できれば面白いのでは?なんて妄想してみてる.
まずは準備として,緑色のペイントマーカーで塗ったものを光らせてみた.
実際に塗った時の感覚よりは光った時の方が明るい.でもこの雑な感じがいい.
ペイントマーカーを買ったのは小学生の時以来かな.縁取りタイプが,すごく流行った.
フロッピーディスクが普及する以前,データはカセットテープに保存されていました.データを記録したり読み出したりする装置をデータレコーダーと呼びます.カセットテープレコーダーとは違って,音質が良いわけではない.
私が使っていた頃に一番信頼性が高かったのはNECのPC-6082(DR-320)という機種でした.リファレンス機って感じかな.他のデータレコーダではロードエラーになるところを,この機種で読み取れればOKという感じ.当然,アナログ入力で,NECのパソコン以外にも富士通やMSXなどの他のメーカのデータレコーダとしても優秀でした.
ゲームソフトウェアを買うと,テープには片面に1200ボー,反対側に2400ボーで記録されていて,1200ボーの方が遅いけどエラー率が低いという感じでした.「ボー」というのは「ボーレート」という単位です.1200ビット/secですね.ソフトウェアのテープは5分から10分収録という感じでした.自分のデータは市販のカセットテープを使って記録していたけどね.
ピーガー音も鳴る!Raspberry Piでデータレコーダーをエミュレートするキットが入荷
https://akiba-pc.watch.impress.co.jp/docs/news/news/1406664.html
あのFAXにもよくあったピーガーというのは,「カンサスシティスタンダード形式」というんですね.初めて知った.もう今,忘れた.
ERROR 1071 (42000): Specified key was too long; max key length is 1000 byte
- カテゴリ :
- PC » Raspberry Pi
- ブロガー :
- ujpblog 2018/9/10 0:32
XOOPS Tenに,xpwikiをインストールしようとしているのだけれど,どうしても失敗する.
xpwikiのsqlディレクトリ配下にあるmysql.sqlを実行してみる.
いくつかのテーブルで,次のようにエラーがでていた.
キーの最大長が1000バイトだけれどそれを超えているよって.ちょっと大変そうだな...
とりあえず,データベースエンジンをMyISAMからInnodbに変更することで対応できた.
xoops_trust_path/modules/xpwiki/sqlにあるSQLファイルを変更.
モジュールインストール ログ

ブロック MenuBar (xpwiki) をインストールしました
ブロック 付箋機能 (xpwiki) をインストールしました
ブロック イベント通知 (xpwiki) をインストールしました
ブロック ページ表示 (xpwiki) をインストールしました
コンフィグ comment_dirname を追加しました
コンフィグ comment_forum_id を追加しました
コンフィグ comment_order を追加しました
コンフィグ comment_view を追加しました
コンフィグ comment_posts_num を追加しました
コンフィグ notification_enabled を追加しました
コンフィグ notification_events を追加しました
コールバック 'xoops_module_install_xpwiki' を実行することができませんでした
xpwiki モジュールのインストールに失敗しました
Force Uninstallation is started.
SQL file found at /www/ipaccess/xoops_trust_path/modules/xpwiki/sql/mysql.sql. Deleting tables...
Table IPACCESSDB__xpwiki_attach dropped.
Table IPACCESSDB__xpwiki_cache dropped.
Table IPACCESSDB__xpwiki_count dropped.
ERROR: Could not drop table IPACCESSDB__xpwiki_pginfo.
ERROR: Could not drop table IPACCESSDB__xpwiki_plain.
ERROR: Could not drop table IPACCESSDB__xpwiki_rel.
ERROR: Could not drop table IPACCESSDB__xpwiki_tb.
ERROR: Could not drop table IPACCESSDB__xpwiki_alias.
root@raspberrypi:/www/ipaccess/xoops_trust_path/modules/xpwiki/sql# ls -la🆑
合計 12
drwxr-xr-x  2 pi pi 4096  9月  9 23:00 .
drwxr-xr-x 17 pi pi 4096  9月  9 23:00 ..
-rw-r--r--  1 pi pi 3613  9月  9 23:00 mysql.sql🈁
root@raspberrypi:/www/ipaccess/xoops_trust_path/modules/xpwiki/sql#
MariaDB [IPACCESSDB]> CREATE TABLE `pginfo` (
    ->   `pgid` int(11) NOT NULL auto_increment,
    ->   `name` varchar(255) binary NOT NULL default '',
    ->   `title` varchar(255) NOT NULL default '',
    ->   `buildtime` int(11) NOT NULL default '0',
    ->   `editedtime` int(11) NOT NULL default '0',
    ->   `uid` mediumint(8) NOT NULL default '0',
    ->   `ucd` varchar(12) NOT NULL default '',
    ->   `uname` varchar(255) NOT NULL default '',
    ->   `freeze` tinyint(1) NOT NULL default '0',
    ->   `einherit` tinyint(1) NOT NULL default '3',
    ->   `eaids` text NOT NULL default '',
    ->   `egids` varchar(255) NOT NULL default '',
    ->   `vinherit` tinyint(1) NOT NULL default '3',
    ->   `vaids` text NOT NULL default '',
    ->   `vgids` varchar(255) NOT NULL default '',
    ->   `lastuid` mediumint(8) NOT NULL default '0',
    ->   `lastucd` varchar(12) NOT NULL default '',
    ->   `lastuname` varchar(255) NOT NULL default '',
    ->   `update` tinyint(1) NOT NULL default '0',
    ->   `reading` varchar(255) binary NOT NULL default '',
    ->   `name_ci` varchar(255) NOT NULL default '',
    ->   `pgorder` float NOT NULL default '1',
    ->   PRIMARY KEY  (`pgid`),
    ->   UNIQUE KEY `name` (`name`),
    ->   KEY `uid` (`uid`),
    ->   KEY `name_ci` (`name_ci`),
    ->   KEY `editedtime` (`editedtime`),
    ->   KEY `freeze` (`freeze`),
    ->   KEY `egids` (`egids`),
    ->   KEY `vgids` (`vgids`),
    ->   KEY `eaids` (`eaids`(255)),
    ->   KEY `vaids` (`vaids`(255)),
    ->   KEY `vids` (`vaids`(200),`vgids`(133))
    -> ) ENGINE=MyISAM;
ERROR 1071 (42000): Specified key was too long; max key length is 1000 bytes🈁
MariaDB [IPACCESSDB]>
とりあえず,データベースエンジンをMyISAMからInnodbに変更することで対応できた.
前:ENGINE=MyISAM;
後:ENGINE=Innodb;
MySQLをWebブラウザベースで操作するツールの定番,phpMyAdminをインストールしてみる.
以下のサイトからダウンロード.
https://www.phpmyadmin.net/
ダウンロードしたファイルは次の通り.
ファイルを展開したものを,公開用ディレクトリに設置.
ログディレクトリも作成しておく.
Apache2用の設定ファイルを作成する.
シンボリックリンクを設置する.
リンク元のファイルの確認.
作成したリンクを確認.
Apacheを再起動.
ブラウザでアクセス.
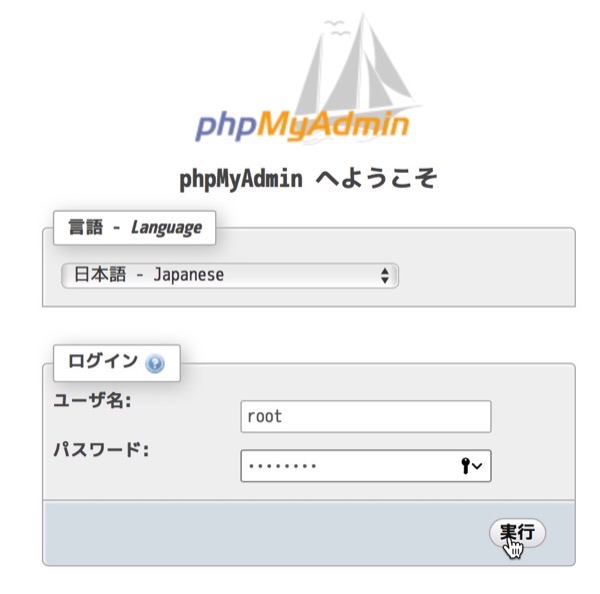
ログインすると,権限のあるデータベースやテーブル,データが確認できる.
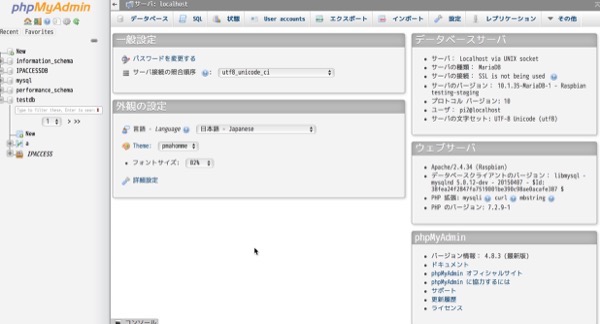
設置するだけなのでとても簡単.危ないねぇ.
以下のサイトからダウンロード.
https://www.phpmyadmin.net/
ダウンロードしたファイルは次の通り.
pi@raspberrypi:~/ダウンロード $ ls -lah🆑
合計 11M
drwxr-xr-x  2 pi pi 4.0K  9月  9 18:43 .
drwxr-xr-x 21 pi pi 4.0K  9月  9 18:43 ..
-rw-r--r--  1 pi pi  11M  9月  9 18:42 phpMyAdmin-4.8.3-all-languages.zip🈁
pi@raspberrypi:~/ダウンロード $
pi@raspberrypi:~/ダウンロード $ sudo mv phpMyAdmin-4.8.3-all-languages /www/phpmyadmin🆑
pi@raspberrypi:~/ダウンロード $ cd /www/phpmyadmin/🆑
pi@raspberrypi:/www/phpmyadmin $
pi@raspberrypi:/etc/apache2/sites-enabled $ sudo mkdir /www/logs/phpmyadmin🆑
pi@raspberrypi:/etc/apache2/sites-enabled $
pi@raspberrypi:/www/phpmyadmin $ cd /etc/apache2/sites-available🆑
pi@raspberrypi:/etc/apache2/sites-available $
pi@raspberrypi:/etc/apache2/sites-available $ cat phpmyadmin.conf🆑
<VirtualHost *:80>
	ServerName 192.168.20.241
	ServerAdmin webmaster@localhost
	DocumentRoot /www/phpmyadmin/
	ErrorLog  /www/logs/phpmyadmin/error.log
	CustomLog /www/logs/phpmyadmin/access.log combined
	DirectoryIndex "index.php" "index.html"
	<Directory "/www/phpmyadmin/">
		Require all granted
	</Directory>
</VirtualHost>
pi@raspberrypi:/etc/apache2/sites-available $
pi@raspberrypi:/etc/apache2/sites-available $ ls -la🆑
合計 28
drwxr-xr-x 2 root root 4096  9月  9 18:49 .
drwxr-xr-x 8 root root 4096  9月  5 23:12 ..
-rw-r--r-- 1 root root 1332  9月 20  2017 000-default.conf
-rw-r--r-- 1 root root 6338  4月  6 03:32 default-ssl.conf
-rw-r--r-- 1 root root  329  9月  6 00:37 ipaccess.conf
-rw-r--r-- 1 root root  329  9月  9 18:49 phpmyadmin.conf🈁
pi@raspberrypi:/etc/apache2/sites-available $
pi@raspberrypi:/etc/apache2/sites-available $ cd ../sites-enabled/🆑
pi@raspberrypi:/etc/apache2/sites-enabled $
pi@raspberrypi:/etc/apache2/sites-enabled $ sudo ln -s ../sites-available/phpmyadmin.conf phpmyadmin.conf🆑
pi@raspberrypi:/etc/apache2/sites-enabled $
pi@raspberrypi:/etc/apache2/sites-enabled $ ls -la🆑
合計 8
drwxr-xr-x 2 root root 4096  9月  9 18:50 .
drwxr-xr-x 8 root root 4096  9月  5 23:12 ..
lrwxrwxrwx 1 root root   32  9月  5 23:00 001-ipaccess.conf -> ../sites-available/ipaccess.conf
lrwxrwxrwx 1 root root   34  9月  9 18:50 phpmyadmin.conf -> ../sites-available/phpmyadmin.conf🈁
pi@raspberrypi:/etc/apache2/sites-enabled $
pi@raspberrypi:/etc/apache2/sites-enabled $ sudo service apache2 stop🆑
pi@raspberrypi:/etc/apache2/sites-enabled $ sudo service apache2 start🆑
pi@raspberrypi:/etc/apache2/sites-enabled $
ログインすると,権限のあるデータベースやテーブル,データが確認できる.
設置するだけなのでとても簡単.危ないねぇ.
XOOPSを入れようとしていて,Protectorの設定を確認.
php.iniを調べる.
ディレクトリ移動.
php.iniファイルの中に,設定値が入っているか確認.
入っていたので,ファイルをバックアップした後に,ファイルの中身を置き換える.
置き換わったことを確認.
他が置き換わってないことも確認.
最初からdiffだけで良いか.
apacheを再起動して有効化されたことを確認.
XOOPSの設定を確認
よかった.
'register_globals' : off   ok
'allow_url_fopen' : on   非推奨🈁
この設定だと、外部の任意のスクリプトを実行される危険性があります
この設定変更にはサーバの管理者権限が必要です
ご自身で管理しているサーバであれば、php.iniやhttpd.confを編集して下さい
そうでない場合は、サーバ管理者にお願いしてみて下さい
root@raspberrypi:/home/pi# locate php.ini🆑
/etc/php/7.2/apache2/php.ini🈁
/etc/php/7.2/cli/php.ini
/usr/lib/php/7.2/php.ini-development
/usr/lib/php/7.2/php.ini-production
/usr/lib/php/7.2/php.ini-production.cli
root@raspberrypi:/home/pi#
root@raspberrypi:/home/pi# cd /etc/php/7.2/apache2/🆑
root@raspberrypi:/etc/php/7.2/apache2# ls -la🆑
合計 84
drwxr-xr-x 3 root root  4096  9月  2 01:26 .
drwxr-xr-x 5 root root  4096  9月  2 01:24 ..
drwxr-xr-x 2 root root  4096  9月  4 23:55 conf.d
-rw-r--r-- 1 root root 70973  8月 19 15:56 php.ini🈁
root@raspberrypi:/etc/php/7.2/apache2#
root@raspberrypi:/etc/php/7.2/apache2# grep allow_url_fopen  php.ini🆑
allow_url_fopen = On🈁
root@raspberrypi:/etc/php/7.2/apache2#
root@raspberrypi:/etc/php/7.2/apache2# cat php.ini.20180909|sed 's/allow_url_fopen = On/allow_url_fopen = Off/g' > php.ini🆑
root@raspberrypi:/etc/php/7.2/apache2#
root@raspberrypi:/etc/php/7.2/apache2# grep allow_url_fopen  php.ini🆑
allow_url_fopen = Off🈁
root@raspberrypi:/etc/php/7.2/apache2#
root@raspberrypi:/etc/php/7.2/apache2# diff php.ini.20180909 php.ini🆑
836c836
< allow_url_fopen = On
---
> allow_url_fopen = Off
root@raspberrypi:/etc/php/7.2/apache2#
apacheを再起動して有効化されたことを確認.
root@raspberrypi:/etc/php/7.2/apache2# service apache2 stop🆑
root@raspberrypi:/etc/php/7.2/apache2# service apache2 start🆑
root@raspberrypi:/etc/php/7.2/apache2#
'register_globals' : off   ok
'allow_url_fopen' : off   ok🈁
'session.use_trans_sid' : off   ok
'XOOPS_DB_PREFIX' : IPACCESS_   ok
locateコマンドのデータベース更新,updatedbは,その処理負荷から頻繁に実行されない.ではいつ実行されるのか調べる.
デイリーのcronに入っている.
ではそのデイリーのcronがいつ実行されるかを確認してみる.
朝の6時25分なのね.夜中のバックアップなどが終わった頃合いってことかなぁ.
root@raspberrypi:/home/pi# locate cron.daily🆑
/etc/cron.daily
/etc/cron.daily/.placeholder
/etc/cron.daily/apache2
/etc/cron.daily/apt-compat
/etc/cron.daily/aptitude
/etc/cron.daily/bsdmainutils
/etc/cron.daily/dpkg
/etc/cron.daily/locate🈁
/etc/cron.daily/logrotate
/etc/cron.daily/man-db
/etc/cron.daily/passwd
root@raspberrypi:/home/pi#
ではそのデイリーのcronがいつ実行されるかを確認してみる.
root@raspberrypi:/home/pi# cat /etc/crontab🆑
# /etc/crontab: system-wide crontab
# Unlike any other crontab you don't have to run the `crontab'
# command to install the new version when you edit this file
# and files in /etc/cron.d. These files also have username fields,
# that none of the other crontabs do.

SHELL=/bin/sh
PATH=/usr/local/sbin:/usr/local/bin:/sbin:/bin:/usr/sbin:/usr/bin

# m h dom mon dow user	command
17 *	* * *	root    cd / && run-parts --report /etc/cron.hourly
25 6	* * *	root	test -x /usr/sbin/anacron || ( cd / && run-parts --report /etc/cron.daily )🈁
47 6	* * 7	root	test -x /usr/sbin/anacron || ( cd / && run-parts --report /etc/cron.weekly )
52 6	1 * *	root	test -x /usr/sbin/anacron || ( cd / && run-parts --report /etc/cron.monthly )
#
root@raspberrypi:/home/pi#
locateはファイル名のデータベース.どこにあるかわからないファイルをファイル名だけで探す時,findコマンドを使うと大変だけれど,locateは定期的にデータベースを更新してくれるので高速に検索できるという仕組み.
インストール完了.データベースを更新する.まずはコマンドを確認.
アップデートを実行.時間を調べてみる.
あら.14秒で完了.まぁ,ファイルの数も少ないし.
そして,お目当のphp.iniがどこに入っているか調べてみる.
なるほど./etc/php.iniじゃないのか.cliとapacheで別になっている.
違いを調べる.
expose_phpをoffにしておけば,HTTPヘッダに不要な情報が出ないし,memory_limitもしかり.Webサーバ設定用ですね.disable_functionsで指定してある関数は,セキュリティ上外部から使われるとまずいやつなのだそうです.コマンドラインだと自由度が高い.
root@raspberrypi:/home/pi# apt-get install locate🆑
パッケージリストを読み込んでいます... 完了
依存関係ツリーを作成しています
状態情報を読み取っています... 完了
以下のパッケージが新たにインストールされます:
  locate
アップグレード: 0 個、新規インストール: 1 個、削除: 0 個、保留: 876 個。
223 kB のアーカイブを取得する必要があります。
この操作後に追加で 318 kB のディスク容量が消費されます。
取得:1 http://ftp.tsukuba.wide.ad.jp/Linux/raspbian/raspbian buster/main armhf locate armhf 4.6.0+git+20180808-2 [223 kB]
223 kB を 1秒 で取得しました (142 kB/s)
以前に未選択のパッケージ locate を選択しています。
(データベースを読み込んでいます ... 現在 107742 個のファイルとディレクトリがインストールされています。)
.../locate_4.6.0+git+20180808-2_armhf.deb を展開する準備をしています ...
locate (4.6.0+git+20180808-2) を展開しています...
locate (4.6.0+git+20180808-2) を設定しています ...
man-db (2.7.6.1-2) のトリガを処理しています ...
root@raspberrypi:/home/pi#
root@raspberrypi:/home/pi# which updatedb🆑
/usr/bin/updatedb
root@raspberrypi:/home/pi#
root@raspberrypi:/home/pi# date;updatedb;date🆑
2018年  9月  9日 日曜日 08:36:41 JST
/usr/bin/find: '/run/user/1000/gvfs': Permission denied
2018年  9月  9日 日曜日 08:36:55 JST
root@raspberrypi:/home/pi#
そして,お目当のphp.iniがどこに入っているか調べてみる.
root@raspberrypi:/home/pi# locate php.ini🆑
/etc/php/7.2/apache2/php.ini
/etc/php/7.2/cli/php.ini
/usr/lib/php/7.2/php.ini-development
/usr/lib/php/7.2/php.ini-production
/usr/lib/php/7.2/php.ini-production.cli
root@raspberrypi:/home/pi#
違いを調べる.
root@raspberrypi:/home/pi# diff /etc/php/7.2/apache2/php.ini /etc/php/7.2/cli/php.ini🆑
314c314
< disable_functions = pcntl_alarm,pcntl_fork,pcntl_waitpid,pcntl_wait,pcntl_wifexited,pcntl_wifstopped,
pcntl_wifsignaled,pcntl_wifcontinued,pcntl_wexitstatus,pcntl_wtermsig,pcntl_wstopsig,
pcntl_signal,pcntl_signal_get_handler,pcntl_signal_dispatch,pcntl_get_last_error,
pcntl_strerror,pcntl_sigprocmask,pcntl_sigwaitinfo,pcntl_sigtimedwait,
pcntl_exec,pcntl_getpriority,pcntl_setpriority,pcntl_async_signals,
---
> disable_functions =
374c374
< expose_php = Off
---
> expose_php = On
404c404
< memory_limit = 128M
---
> memory_limit = -1
root@raspberrypi:/home/pi#
PHPアプリからFTPアップロードできなかったので,調べたらこれもライブラリが入ってなかったので入れて見ました.
何の苦労もない...
root@raspberrypi:/www/ipaccess/html# apt-get install php-net-ftp🆑
パッケージリストを読み込んでいます... 完了
依存関係ツリーを作成しています
状態情報を読み取っています... 完了
以下のパッケージが新たにインストールされます:
  php-net-ftp
アップグレード: 0 個、新規インストール: 1 個、削除: 0 個、保留: 876 個。
36.9 kB のアーカイブを取得する必要があります。
この操作後に追加で 163 kB のディスク容量が消費されます。
取得:1 http://ftp.tsukuba.wide.ad.jp/Linux/raspbian/raspbian stretch/main armhf php-net-ftp all 1:1.4.0-2 [36.9 kB]
36.9 kB を 1秒 で取得しました (29.3 kB/s)
以前に未選択のパッケージ php-net-ftp を選択しています。
(データベースを読み込んでいます ... 現在 107724 個のファイルとディレクトリがインストールされています。)
.../php-net-ftp_1%3a1.4.0-2_all.deb を展開する準備をしています ...
php-net-ftp (1:1.4.0-2) を展開しています...
php-net-ftp (1:1.4.0-2) を設定しています ...
root@raspberrypi:/www/ipaccess/html#
Raspbian 9.4だとFTPクライアントが入っていない.
最近,入ってないことが多い.暗号化しない通信を行うものは排除の傾向.
パッケージをインストールする.
コマンドを確認.
入りました.
pi@raspberrypi:/www/ipaccess/html $ which ftp🆑
pi@raspberrypi:/www/ipaccess/html $
パッケージをインストールする.
root@raspberrypi:/www/ipaccess/html# apt-get install ftp🆑
パッケージリストを読み込んでいます... 完了
依存関係ツリーを作成しています
状態情報を読み取っています... 完了
以下のパッケージが新たにインストールされます:
  ftp
アップグレード: 0 個、新規インストール: 1 個、削除: 0 個、保留: 876 個。
57.4 kB のアーカイブを取得する必要があります。
この操作後に追加で 128 kB のディスク容量が消費されます。
取得:1 http://ftp.tsukuba.wide.ad.jp/Linux/raspbian/raspbian stretch/main armhf ftp armhf 0.17-34 [57.4 kB]
57.4 kB を 0秒 で取得しました (71.8 kB/s)
以前に未選択のパッケージ ftp を選択しています。
(データベースを読み込んでいます ... 現在 107715 個のファイルとディレクトリがインストールされています。)
.../archives/ftp_0.17-34_armhf.deb を展開する準備をしています ...
ftp (0.17-34) を展開しています...
ftp (0.17-34) を設定しています ...
update-alternatives: /usr/bin/ftp (ftp) を提供するために自動モードで /usr/bin/netkit-ftp を使います
man-db (2.7.6.1-2) のトリガを処理しています ...
root@raspberrypi:/www/ipaccess/html#
root@raspberrypi:/www/ipaccess/html# which ftp🆑
/usr/bin/ftp🈁
root@raspberrypi:/www/ipaccess/html#
apache2からはsites-availableディレクトリにファイルを設置する.現在状態を確認.
次のような設定ファイルを作成.
設定ファイルを有効にするために,sites-enabledディレクトリを確認.
リンクを設置.
リンクが作られたか確認.
不要なリンクを削除.
設定が終わったら,Apache2の再起動を行う.
これで,/www/ipaccess/htmlに配置したコンテンツをみることができるようになったはずです.
root@raspberrypi:/etc/apache2/sites-available# ls -la🆑
合計 28
drwxr-xr-x 2 root root 4096  9月  5 22:44 .
drwxr-xr-x 8 root root 4096  9月  2 23:11 ..
-rw-r--r-- 1 root root 1332  9月 20  2017 000-default.conf
-rw-r--r-- 1 root root 6338  4月  6 03:32 default-ssl.conf
root@raspberrypi:/etc/apache2/sites-available#
root@raspberrypi:/etc/apache2/sites-available# cat ipaccess.conf🆑
<VirtualHost *:80>
        ServerName 192.168.20.241
        ServerAdmin webmaster@localhost
        DocumentRoot /www/ipaccess/html
        ErrorLog  /www/logs/ipaccess/error.log
        CustomLog /www/logs/ipaccess/access.log combined
        DirectoryIndex "index.php" "index.html"
        <Directory "/www/ipaccess/html">
                Require all granted
        </Directory>
</VirtualHost>
root@raspberrypi:/etc/apache2/sites-available#
root@raspberrypi:/etc/apache2/sites-available# cd ../sites-enabled/🆑
root@raspberrypi:/etc/apache2/sites-enabled# ls -la🆑
合計 8
drwxr-xr-x 2 root root 4096  9月  2 01:26 .
drwxr-xr-x 8 root root 4096  9月  2 23:11 ..
lrwxrwxrwx 1 root root   35  9月  2 01:26 000-default.conf -> ../sites-available/000-default.conf🈁
root@raspberrypi:/etc/apache2/sites-enabled#
root@raspberrypi:/etc/apache2/sites-enabled# ln -s ../sites-available/ipaccess.conf 001-ipaccess.conf🆑
root@raspberrypi:/etc/apache2/sites-enabled#
root@raspberrypi:/etc/apache2/sites-enabled# ls -la🆑
合計 8
drwxr-xr-x 2 root root 4096  9月  5 23:00 .
drwxr-xr-x 8 root root 4096  9月  2 23:11 ..
lrwxrwxrwx 1 root root   35  9月  2 01:26 000-default.conf -> ../sites-available/000-default.conf
lrwxrwxrwx 1 root root   32  9月  5 23:00 001-ipaccess.conf -> ../sites-available/ipaccess.conf🈁
root@raspberrypi:/etc/apache2/sites-enabled#
root@raspberrypi:/etc/apache2/sites-enabled# rm 000-default.conf🆑
root@raspberrypi:/etc/apache2/sites-enabled# ls -la🆑
合計 8
drwxr-xr-x 2 root root 4096  9月  5 23:02 .
drwxr-xr-x 8 root root 4096  9月  2 23:11 ..
lrwxrwxrwx 1 root root   32  9月  5 23:00 001-ipaccess.conf -> ../sites-available/ipaccess.conf🈁
root@raspberrypi:/etc/apache2/sites-enabled#
root@raspberrypi:/etc/apache2/sites-enabled# service apache2 stop🆑
root@raspberrypi:/etc/apache2/sites-enabled# service apache2 start🆑
root@raspberrypi:/etc/apache2/sites-enabled#
この前インストールしたPHP7.2でデフォルトで入っているオプションパッケージを確認.
opcacheというのは初耳!だけれど,インタプリタ型のPHPを実行時にコンパイルした内容をメモリにキャッシュしてくれるものらしい.
ちょっと足りないので,いくつかをインストール.
用意されているパッケージを確認.
この中から,この3つのモジュールを追加でインストール.
インストールしてみる.
特に問題なくインストール完了.
root@raspberrypi:/var/www/html# dpkg -l|grep php🆑
ii  libapache2-mod-php7.2 7.2.9-1  armhf  server-side, HTML-embedded scripting language (Apache 2 module)
ii  php-common            1:62     all    Common files for PHP packages
ii  php7.2                7.2.9-1  all    server-side, HTML-embedded scripting language (metapackage)
ii  php7.2-cli            7.2.9-1  armhf  command-line interpreter for the PHP scripting language
ii  php7.2-common         7.2.9-1  armhf  documentation, examples and common module for PHP
ii  php7.2-json           7.2.9-1  armhf  JSON module for PHP
ii  php7.2-mysql          7.2.9-1  armhf  MySQL module for PHP
ii  php7.2-opcache        7.2.9-1  armhf  Zend OpCache module for PHP
ii  php7.2-readline       7.2.9-1  armhf  readline module for PHP
root@raspberrypi:/var/www/html#
ちょっと足りないので,いくつかをインストール.
用意されているパッケージを確認.
root@raspberrypi:/var/www/html# apt-cache search php7.2🆑
php-amqp - AMQP extension for PHP
php-apcu - APC User Cache for PHP
php-geoip - GeoIP module for PHP
php-gmagick - Provides a wrapper to the GraphicsMagick library
php-gnupg - PHP wrapper around the gpgme library
php-imagick - Provides a wrapper to the ImageMagick library
php-mailparse - Email message manipulation for PHP
php-memcache - memcache extension module for PHP
php-mongodb - MongoDB driver for PHP
php-msgpack - PHP extension for interfacing with MessagePack
php-oauth - OAuth 1.0 consumer and provider extension
php-propro - propro module for PHP
php-radius - radius client library for PHP
php-raphf - raphf module for PHP
php-rrd - PHP bindings to rrd tool system
php-smbclient - PHP wrapper for libsmbclient
php-solr - PHP extension for communicating with Apache Solr server
php-ssh2 - Bindings for the libssh2 library
php-stomp - Streaming Text Oriented Messaging Protocol (STOMP) client module for PHP
php-tideways - Tideways PHP Profiler Extension
php-uploadprogress - file upload progress tracking extension for PHP
php-uuid - PHP UUID extension
php-xdebug - Xdebug Module for PHP
php-yac - YAC (Yet Another Cache) for PHP
libapache2-mod-php7.2 - server-side, HTML-embedded scripting language (Apache 2 module)
libphp7.2-embed - HTML-embedded scripting language (Embedded SAPI library)
php-all-dev - package depending on all supported PHP development packages
php-ds - PHP extension providing efficient data structures for PHP 7
php-sass - PHP bindings to libsass - fast, native Sass parsing in PHP
php7.2 - server-side, HTML-embedded scripting language (metapackage)
php7.2-bcmath - Bcmath module for PHP
php7.2-bz2 - bzip2 module for PHP
php7.2-cgi - server-side, HTML-embedded scripting language (CGI binary)
php7.2-cli - command-line interpreter for the PHP scripting language
php7.2-common - documentation, examples and common module for PHP
php7.2-curl - CURL module for PHP⭐️
php7.2-dba - DBA module for PHP
php7.2-dev - Files for PHP7.2 module development
php7.2-enchant - Enchant module for PHP
php7.2-fpm - server-side, HTML-embedded scripting language (FPM-CGI binary)
php7.2-gd - GD module for PHP⭐️
php7.2-gmp - GMP module for PHP
php7.2-imap - IMAP module for PHP
php7.2-interbase - Interbase module for PHP
php7.2-intl - Internationalisation module for PHP
php7.2-json - JSON module for PHP
php7.2-ldap - LDAP module for PHP
php7.2-mbstring - MBSTRING module for PHP⭐️
php7.2-mysql - MySQL module for PHP
php7.2-odbc - ODBC module for PHP
php7.2-opcache - Zend OpCache module for PHP
php7.2-pgsql - PostgreSQL module for PHP
php7.2-phpdbg - server-side, HTML-embedded scripting language (PHPDBG binary)
php7.2-pspell - pspell module for PHP
php7.2-readline - readline module for PHP
php7.2-recode - recode module for PHP
php7.2-snmp - SNMP module for PHP
php7.2-soap - SOAP module for PHP
php7.2-sqlite3 - SQLite3 module for PHP
php7.2-sybase - Sybase module for PHP
php7.2-tidy - tidy module for PHP
php7.2-xml - DOM, SimpleXML, WDDX, XML, and XSL module for PHP
php7.2-xmlrpc - XMLRPC-EPI module for PHP
php7.2-xsl - XSL module for PHP (dummy)
php7.2-zip - Zip module for PHP
root@raspberrypi:/var/www/html#
php7.2-curl - CURL module for PHP⭐️
php7.2-gd - GD module for PHP⭐️
php7.2-mbstring - MBSTRING module for PHP⭐️
root@raspberrypi:/var/www/html# apt-get install php7.2-curl php7.2-gd php7.2-mbstring🆑
パッケージリストを読み込んでいます... 完了
依存関係ツリーを作成しています
状態情報を読み取っています... 完了
以下のパッケージが新たにインストールされます:
  php7.2-curl php7.2-gd php7.2-mbstring
アップグレード: 0 個、新規インストール: 3 個、削除: 0 個、保留: 876 個。
490 kB のアーカイブを取得する必要があります。
この操作後に追加で 1,658 kB のディスク容量が消費されます。
取得:1 http://ftp.tsukuba.wide.ad.jp/Linux/raspbian/raspbian buster/main armhf php7.2-curl armhf 7.2.9-1 [25.3 kB]
取得:2 http://ftp.tsukuba.wide.ad.jp/Linux/raspbian/raspbian buster/main armhf php7.2-gd armhf 7.2.9-1 [22.7 kB]
取得:3 http://ftp.tsukuba.wide.ad.jp/Linux/raspbian/raspbian buster/main armhf php7.2-mbstring armhf 7.2.9-1 [442 kB]
490 kB を 2秒 で取得しました (196 kB/s)
以前に未選択のパッケージ php7.2-curl を選択しています。
(データベースを読み込んでいます ... 現在 107688 個のファイルとディレクトリがインストールされています。)
.../php7.2-curl_7.2.9-1_armhf.deb を展開する準備をしています ...
php7.2-curl (7.2.9-1) を展開しています...
以前に未選択のパッケージ php7.2-gd を選択しています。
.../php7.2-gd_7.2.9-1_armhf.deb を展開する準備をしています ...
php7.2-gd (7.2.9-1) を展開しています...
以前に未選択のパッケージ php7.2-mbstring を選択しています。
.../php7.2-mbstring_7.2.9-1_armhf.deb を展開する準備をしています ...
php7.2-mbstring (7.2.9-1) を展開しています...
php7.2-gd (7.2.9-1) を設定しています ...

Creating config file /etc/php/7.2/mods-available/gd.ini with new version
php7.2-curl (7.2.9-1) を設定しています ...

Creating config file /etc/php/7.2/mods-available/curl.ini with new version
php7.2-mbstring (7.2.9-1) を設定しています ...

Creating config file /etc/php/7.2/mods-available/mbstring.ini with new version
libapache2-mod-php7.2 (7.2.9-1) のトリガを処理しています ...
root@raspberrypi:/var/www/html#
Raspbian 9.4上のMarinaDB 10.で,mysql_secure_installationを実行
- カテゴリ :
- PC » Raspberry Pi
- ブロガー :
- ujpblog 2018/9/3 0:41
ファイルの存在を確認する.
実行する.
rootユーザのパスワードを入力.
rootユーザのパスワードを変更するか?と訊かれているが,今回は前の手順で設定済みなのでnを選択.
MarinDBにはデフォルトで匿名ユーザがあって,誰でもアクセスできるけど,本番移行する前に消した方が良いけど?と訊かれているので,削除してもらうためにyを回答.
rootユーザ接続はローカルからのみ許可しとけばパスワードが漏れることがないけど,リモート接続を禁止するか?と言われるので,yを選択.
デフォルトでtestというデータベースが作られているけれど,本番移行前に消しますか?と訊かれているのでyを選択.
特権テーブルのリロードで全ての変更が有効になるけど?ということでyを選択.
設定は終わった模様.
root@raspberrypi:/var/log/apache2# ls -la /usr/bin/|grep secure🆑
-rwxr-xr-x  1 root root       12527  8月  8 04:18 mysql_secure_installation🈁
root@raspberrypi:/var/log/apache2#
root@raspberrypi:/var/log/apache2# /usr/bin/mysql_secure_installation🆑

NOTE: RUNNING ALL PARTS OF THIS SCRIPT IS RECOMMENDED FOR ALL MariaDB
      SERVERS IN PRODUCTION USE!  PLEASE READ EACH STEP CAREFULLY!

In order to log into MariaDB to secure it, we'll need the current
password for the root user.  If you've just installed MariaDB, and
you haven't set the root password yet, the password will be blank,
so you should just press enter here.

Enter current password for root (enter for none):
Enter current password for root (enter for none):🆑
OK, successfully used password, moving on...

Setting the root password ensures that nobody can log into the MariaDB
root user without the proper authorisation.

You already have a root password set, so you can safely answer 'n'.

Change the root password? [Y/n]
Change the root password? [Y/n] n🆑
 ... skipping.

By default, a MariaDB installation has an anonymous user, allowing anyone
to log into MariaDB without having to have a user account created for
them.  This is intended only for testing, and to make the installation
go a bit smoother.  You should remove them before moving into a
production environment.

Remove anonymous users? [Y/n]
Remove anonymous users? [Y/n] y🆑
 ... Success!

Normally, root should only be allowed to connect from 'localhost'.  This
ensures that someone cannot guess at the root password from the network.

Disallow root login remotely? [Y/n]
Disallow root login remotely? [Y/n] y🆑
 ... Success!

By default, MariaDB comes with a database named 'test' that anyone can
access.  This is also intended only for testing, and should be removed
before moving into a production environment.

Remove test database and access to it? [Y/n]
Remove test database and access to it? [Y/n] y🆑
 - Dropping test database...
 ... Success!
 - Removing privileges on test database...
 ... Success!

Reloading the privilege tables will ensure that all changes made so far
will take effect immediately.

Reload privilege tables now? [Y/n]
Reload privilege tables now? [Y/n] y🆑
 ... Success!

Cleaning up...

All done!  If you've completed all of the above steps, your MariaDB
installation should now be secure.

Thanks for using MariaDB!
root@raspberrypi:/var/log/apache2#
Raspbian 9.4上のPHP7.2.9とMySQL(MariaDB 10.1.35)でPHP7.2-mysqlを使ってDB接続を行ってみる Uncaught Error: Call to undefined function
- カテゴリ :
- PC » Raspberry Pi
- ブロガー :
- ujpblog 2018/9/2 23:08
以前書いたこれと同じことをやってみる.
実行してみる.
エラーになった.mysql関数ではなく,mysqli関数を使うのが正解だそうです.
プログラムを次のように修正.
diffで確認.
実行してみる.
接続できました.
root@raspberrypi:~ $ cd /var/www/html🆑
root@raspberrypi:/var/www/html#
root@raspberrypi:/var/www/html# cat dbconnect.php🆑
<?php
   $link = mysql_connect("localhost", "root", "password")
       or die("Could not connect¥n");
   print ("Connected successfully¥n");
   mysql_close($link);
?>
root@raspberrypi:/var/www/html#
root@raspberrypi:/var/www/html# php dbconnect.php🆑
PHP Fatal error:  Uncaught Error: Call to undefined function mysql_connect() in
 /var/www/html/dbconnect.php:2
Stack trace:
#0 {main}
  thrown in /var/www/html/dbconnect.php on line 2
root@raspberrypi:/var/www/html#
プログラムを次のように修正.
root@raspberrypi:/var/www/html# cat dbconnect.php🆑
<?php
   $link = mysqli_connect("localhost", "root", "password")
       or die("Could not connect\n");
   print ("Connected successfully\n");
   mysqli_close($link);
?>
root@raspberrypi:/var/www/html#
root@raspberrypi:/var/www/html# diff dbconnect.php.old dbconnect.php🆑
2c2
<    $link = mysql_connect("localhost", "root", "password")
---
>    $link = mysqli_connect("localhost", "root", "password")
5c5
<    mysql_close($link);
---
>    mysqli_close($link);
root@raspberrypi:/var/www/html#
root@raspberrypi:/var/www/html# php dbconnect.php🆑
Connected successfully
root@raspberrypi:/var/www/html#
Apache HTTPD サーバのの停止と起動方法を確認.
Apache Web Serverを停止してステータスを確認.
停止していますね.
次に,起動してステータス確認.
プロセスを確認.
www-dataというユーザで起動している模様.
念のために,リモートからログインできないように設定されているか確認.
ちゃんとシェルがない状態でした.
pi@raspberrypi:~ $ service apache2 status🆑
● apache2.service - The Apache HTTP Server
   Loaded: loaded (/lib/systemd/system/apache2.service; enabled; vendor preset: enabled)
   Active: active (running) since Sun 2018-09-02 01:34:42 JST; 17h ago
 Main PID: 459 (apache2)
   CGroup: /system.slice/apache2.service
           ├─ 459 /usr/sbin/apache2 -k start
           ├─ 486 /usr/sbin/apache2 -k start
           ├─ 487 /usr/sbin/apache2 -k start
           ├─ 488 /usr/sbin/apache2 -k start
           ├─ 489 /usr/sbin/apache2 -k start
           ├─ 490 /usr/sbin/apache2 -k start
           ├─7383 /usr/sbin/apache2 -k start
           ├─7384 /usr/sbin/apache2 -k start
           └─7385 /usr/sbin/apache2 -k start

 9月 02 01:34:41 raspberrypi systemd[1]: Starting The Apache HTTP Server...
 9月 02 01:34:42 raspberrypi apachectl[419]: AH00558: apache2: Could not reliably determine the server's fully qualified
 9月 02 01:34:42 raspberrypi systemd[1]: Started The Apache HTTP Server.
pi@raspberrypi:~ $
pi@raspberrypi:~ $ sudo service apache2 stop🆑
pi@raspberrypi:~ $ service apache2 status🆑
● apache2.service - The Apache HTTP Server
   Loaded: loaded (/lib/systemd/system/apache2.service; enabled; vendor preset: enabled)
   Active: inactive (dead)🈁 since Sun 2018-09-02 19:01:59 JST; 5s ago
  Process: 7422 ExecStop=/usr/sbin/apachectl stop (code=exited, status=0/SUCCESS)
 Main PID: 459 (code=exited, status=0/SUCCESS)

 9月 02 01:34:41 raspberrypi systemd[1]: Starting The Apache HTTP Server...
 9月 02 01:34:42 raspberrypi apachectl[419]: AH00558: apache2: Could not reliably determine the server's fully qualified
 9月 02 01:34:42 raspberrypi systemd[1]: Started The Apache HTTP Server.
 9月 02 19:01:59 raspberrypi systemd[1]: Stopping The Apache HTTP Server...
 9月 02 19:01:59 raspberrypi apachectl[7422]: AH00558: apache2: Could not reliably determine the server's fully qualified
 9月 02 19:01:59 raspberrypi systemd[1]: Stopped The Apache HTTP Server.
pi@raspberrypi:~ $
次に,起動してステータス確認.
pi@raspberrypi:~ $ sudo service apache2 start🆑
pi@raspberrypi:~ $ service apache2 status🆑
● apache2.service - The Apache HTTP Server
   Loaded: loaded (/lib/systemd/system/apache2.service; enabled; vendor preset: enabled)
   Active: active (running) since Sun 2018-09-02 19:02:11 JST; 2s ago
  Process: 7422 ExecStop=/usr/sbin/apachectl stop (code=exited, status=0/SUCCESS)
  Process: 7466 ExecStart=/usr/sbin/apachectl start (code=exited, status=0/SUCCESS)
 Main PID: 7470 (apache2)
   CGroup: /system.slice/apache2.service
           ├─7470 /usr/sbin/apache2 -k start
           ├─7474 /usr/sbin/apache2 -k start
           ├─7475 /usr/sbin/apache2 -k start
           ├─7476 /usr/sbin/apache2 -k start
           ├─7477 /usr/sbin/apache2 -k start
           └─7478 /usr/sbin/apache2 -k start

 9月 02 19:02:11 raspberrypi systemd[1]: Starting The Apache HTTP Server...
 9月 02 19:02:11 raspberrypi apachectl[7466]: AH00558: apache2: Could not reliably determine the server's fully qualified
 9月 02 19:02:11 raspberrypi systemd[1]: Started The Apache HTTP Server.
pi@raspberrypi:~ $
pi@raspberrypi:~ $ ps -ef|grep apache🆑
root      7470     1  0 19:02 ?        00:00:00 /usr/sbin/apache2 -k start
www-data  7474  7470  0 19:02 ?        00:00:00 /usr/sbin/apache2 -k start
www-data  7475  7470  0 19:02 ?        00:00:00 /usr/sbin/apache2 -k start
www-data  7476  7470  0 19:02 ?        00:00:00 /usr/sbin/apache2 -k start
www-data  7477  7470  0 19:02 ?        00:00:00 /usr/sbin/apache2 -k start
www-data  7478  7470  0 19:02 ?        00:00:00 /usr/sbin/apache2 -k start
pi        7485  5883  0 19:04 pts/0    00:00:00 grep --color=auto apache
pi@raspberrypi:~ $
念のために,リモートからログインできないように設定されているか確認.
pi@raspberrypi:~ $ cat /etc/passwd|grep www-data🆑
www-data:x:33:33:www-data:/var/www:/usr/sbin/nologin🈁
pi@raspberrypi:~ $
Raspbian 9.4をインストールした後に,apt-get upgradeしているのだけれど,現在状態はこんな感じ.
Apache2パッケージでインストールされたファイルや作成されたディレクトリを確認.
気になったものを確認.
まずは,ホームディレクトリ.htdocsか.
そしてログの場所.
すでに何かのエラーが出ている模様...
そして,設定ファイル.今回はコメントと空白行を除外して確認.
なるほどね.
Webブラウザでアクセスしてみる.
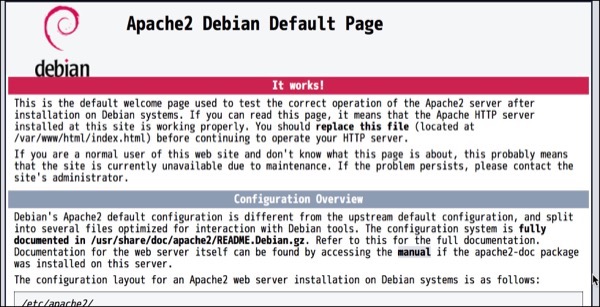
デフォルトページが表示.アクセスログを確認する.
アクセスログが増えました.
pi@raspberrypi:~ $ dpkg -l|grep apache🆑
ii  apache2               2.4.34-1  armhf  Apache HTTP Server
ii  apache2-bin           2.4.34-1  armhf  Apache HTTP Server (modules and other binary files)
ii  apache2-data          2.4.34-1  all    Apache HTTP Server (common files)
ii  apache2-utils         2.4.34-1  armhf  Apache HTTP Server (utility programs for web servers)
ii  libapache2-mod-php7.2 7.2.9-1   armhf  server-side, HTML-embedded scripting language (Apache 2 module)
pi@raspberrypi:~ $
pi@raspberrypi:~ $ dpkg -L apache2🆑
/.
/etc
/etc/apache2
/etc/apache2/apache2.conf🈁
/etc/apache2/conf-available
/etc/apache2/conf-available/charset.conf
/etc/apache2/conf-available/localized-error-pages.conf
/etc/apache2/conf-available/other-vhosts-access-log.conf
/etc/apache2/conf-available/security.conf
/etc/apache2/conf-available/serve-cgi-bin.conf
/etc/apache2/conf-enabled
/etc/apache2/envvars
/etc/apache2/magic
/etc/apache2/mods-available
/etc/apache2/mods-available/access_compat.load
/etc/apache2/mods-available/actions.conf
/etc/apache2/mods-available/actions.load
/etc/apache2/mods-available/alias.conf
/etc/apache2/mods-available/alias.load
/etc/apache2/mods-available/allowmethods.load
/etc/apache2/mods-available/asis.load
/etc/apache2/mods-available/auth_basic.load
/etc/apache2/mods-available/auth_digest.load
/etc/apache2/mods-available/auth_form.load
/etc/apache2/mods-available/authn_anon.load
/etc/apache2/mods-available/authn_core.load
/etc/apache2/mods-available/authn_dbd.load
/etc/apache2/mods-available/authn_dbm.load
/etc/apache2/mods-available/authn_file.load
/etc/apache2/mods-available/authn_socache.load
/etc/apache2/mods-available/authnz_fcgi.load
/etc/apache2/mods-available/authnz_ldap.load
/etc/apache2/mods-available/authz_core.load
/etc/apache2/mods-available/authz_dbd.load
/etc/apache2/mods-available/authz_dbm.load
/etc/apache2/mods-available/authz_groupfile.load
/etc/apache2/mods-available/authz_host.load
/etc/apache2/mods-available/authz_owner.load
/etc/apache2/mods-available/authz_user.load
/etc/apache2/mods-available/autoindex.conf
/etc/apache2/mods-available/autoindex.load
/etc/apache2/mods-available/brotli.load
/etc/apache2/mods-available/buffer.load
/etc/apache2/mods-available/cache.load
/etc/apache2/mods-available/cache_disk.conf
/etc/apache2/mods-available/cache_disk.load
/etc/apache2/mods-available/cache_socache.load
/etc/apache2/mods-available/cern_meta.load
/etc/apache2/mods-available/cgi.load
/etc/apache2/mods-available/cgid.conf
/etc/apache2/mods-available/cgid.load
/etc/apache2/mods-available/charset_lite.load
/etc/apache2/mods-available/data.load
/etc/apache2/mods-available/dav.load
/etc/apache2/mods-available/dav_fs.conf
/etc/apache2/mods-available/dav_fs.load
/etc/apache2/mods-available/dav_lock.load
/etc/apache2/mods-available/dbd.load
/etc/apache2/mods-available/deflate.conf
/etc/apache2/mods-available/deflate.load
/etc/apache2/mods-available/dialup.load
/etc/apache2/mods-available/dir.conf
/etc/apache2/mods-available/dir.load
/etc/apache2/mods-available/dump_io.load
/etc/apache2/mods-available/echo.load
/etc/apache2/mods-available/env.load
/etc/apache2/mods-available/expires.load
/etc/apache2/mods-available/ext_filter.load
/etc/apache2/mods-available/file_cache.load
/etc/apache2/mods-available/filter.load
/etc/apache2/mods-available/headers.load
/etc/apache2/mods-available/heartbeat.load
/etc/apache2/mods-available/heartmonitor.load
/etc/apache2/mods-available/http2.load
/etc/apache2/mods-available/ident.load
/etc/apache2/mods-available/imagemap.load
/etc/apache2/mods-available/include.load
/etc/apache2/mods-available/info.conf
/etc/apache2/mods-available/info.load
/etc/apache2/mods-available/lbmethod_bybusyness.load
/etc/apache2/mods-available/lbmethod_byrequests.load
/etc/apache2/mods-available/lbmethod_bytraffic.load
/etc/apache2/mods-available/lbmethod_heartbeat.load
/etc/apache2/mods-available/ldap.conf
/etc/apache2/mods-available/ldap.load
/etc/apache2/mods-available/log_debug.load
/etc/apache2/mods-available/log_forensic.load
/etc/apache2/mods-available/lua.load
/etc/apache2/mods-available/macro.load
/etc/apache2/mods-available/md.load
/etc/apache2/mods-available/mime.conf
/etc/apache2/mods-available/mime.load
/etc/apache2/mods-available/mime_magic.conf
/etc/apache2/mods-available/mime_magic.load
/etc/apache2/mods-available/mpm_event.conf
/etc/apache2/mods-available/mpm_event.load
/etc/apache2/mods-available/mpm_prefork.conf
/etc/apache2/mods-available/mpm_prefork.load
/etc/apache2/mods-available/mpm_worker.conf
/etc/apache2/mods-available/mpm_worker.load
/etc/apache2/mods-available/negotiation.conf
/etc/apache2/mods-available/negotiation.load
/etc/apache2/mods-available/proxy.conf
/etc/apache2/mods-available/proxy.load
/etc/apache2/mods-available/proxy_ajp.load
/etc/apache2/mods-available/proxy_balancer.conf
/etc/apache2/mods-available/proxy_balancer.load
/etc/apache2/mods-available/proxy_connect.load
/etc/apache2/mods-available/proxy_express.load
/etc/apache2/mods-available/proxy_fcgi.load
/etc/apache2/mods-available/proxy_fdpass.load
/etc/apache2/mods-available/proxy_ftp.conf
/etc/apache2/mods-available/proxy_ftp.load
/etc/apache2/mods-available/proxy_hcheck.load
/etc/apache2/mods-available/proxy_html.conf
/etc/apache2/mods-available/proxy_html.load
/etc/apache2/mods-available/proxy_http.load
/etc/apache2/mods-available/proxy_http2.load
/etc/apache2/mods-available/proxy_scgi.load
/etc/apache2/mods-available/proxy_uwsgi.load
/etc/apache2/mods-available/proxy_wstunnel.load
/etc/apache2/mods-available/ratelimit.load
/etc/apache2/mods-available/reflector.load
/etc/apache2/mods-available/remoteip.load
/etc/apache2/mods-available/reqtimeout.conf
/etc/apache2/mods-available/reqtimeout.load
/etc/apache2/mods-available/request.load
/etc/apache2/mods-available/rewrite.load
/etc/apache2/mods-available/sed.load
/etc/apache2/mods-available/session.load
/etc/apache2/mods-available/session_cookie.load
/etc/apache2/mods-available/session_crypto.load
/etc/apache2/mods-available/session_dbd.load
/etc/apache2/mods-available/setenvif.conf
/etc/apache2/mods-available/setenvif.load
/etc/apache2/mods-available/slotmem_plain.load
/etc/apache2/mods-available/slotmem_shm.load
/etc/apache2/mods-available/socache_dbm.load
/etc/apache2/mods-available/socache_memcache.load
/etc/apache2/mods-available/socache_shmcb.load
/etc/apache2/mods-available/speling.load
/etc/apache2/mods-available/ssl.conf
/etc/apache2/mods-available/ssl.load
/etc/apache2/mods-available/status.conf
/etc/apache2/mods-available/status.load
/etc/apache2/mods-available/substitute.load
/etc/apache2/mods-available/suexec.load
/etc/apache2/mods-available/unique_id.load
/etc/apache2/mods-available/userdir.conf
/etc/apache2/mods-available/userdir.load
/etc/apache2/mods-available/usertrack.load
/etc/apache2/mods-available/vhost_alias.load
/etc/apache2/mods-available/xml2enc.load
/etc/apache2/mods-enabled
/etc/apache2/ports.conf
/etc/apache2/sites-available
/etc/apache2/sites-available/000-default.conf
/etc/apache2/sites-available/default-ssl.conf
/etc/apache2/sites-enabled
/etc/cron.daily
/etc/cron.daily/apache2
/etc/default
/etc/default/apache-htcacheclean
/etc/init.d
/etc/init.d/apache-htcacheclean
/etc/init.d/apache2
/etc/logrotate.d
/etc/logrotate.d/apache2
/lib
/lib/systemd
/lib/systemd/system
/lib/systemd/system/apache-htcacheclean.service
/lib/systemd/system/apache-htcacheclean@.service
/lib/systemd/system/apache2.service
/lib/systemd/system/apache2@.service
/usr
/usr/lib
/usr/lib/cgi-bin
/usr/sbin
/usr/sbin/a2enmod
/usr/sbin/a2query
/usr/sbin/apache2ctl
/usr/share
/usr/share/apache2
/usr/share/apache2/apache2-maintscript-helper
/usr/share/apache2/ask-for-passphrase
/usr/share/bash-completion
/usr/share/bash-completion/completions
/usr/share/bash-completion/completions/a2enmod
/usr/share/bug
/usr/share/bug/apache2
/usr/share/doc
/usr/share/doc/apache2
/usr/share/doc/apache2/NEWS.Debian.gz
/usr/share/doc/apache2/PACKAGING.gz
/usr/share/doc/apache2/README.Debian.gz
/usr/share/doc/apache2/README.backtrace
/usr/share/doc/apache2/README.multiple-instances
/usr/share/doc/apache2/changelog.Debian.gz
/usr/share/doc/apache2/changelog.gz
/usr/share/doc/apache2/copyright
/usr/share/doc/apache2/examples
/usr/share/doc/apache2/examples/apache2.monit
/usr/share/doc/apache2/examples/secondary-init-script
/usr/share/doc/apache2/examples/setup-instance
/usr/share/lintian
/usr/share/lintian/overrides
/usr/share/lintian/overrides/apache2
/usr/share/man
/usr/share/man/man1
/usr/share/man/man1/a2query.1.gz
/usr/share/man/man8
/usr/share/man/man8/a2enconf.8.gz
/usr/share/man/man8/a2enmod.8.gz
/usr/share/man/man8/a2ensite.8.gz
/usr/share/man/man8/apache2ctl.8.gz
/var
/var/cache
/var/cache/apache2
/var/cache/apache2/mod_cache_disk
/var/lib
/var/lib/apache2
/var/log
/var/log/apache2🈁
/var/www🈁
/var/www/html
/usr/sbin/a2disconf
/usr/sbin/a2dismod
/usr/sbin/a2dissite
/usr/sbin/a2enconf
/usr/sbin/a2ensite
/usr/sbin/apachectl
/usr/share/bash-completion/completions/a2disconf
/usr/share/bash-completion/completions/a2dismod
/usr/share/bash-completion/completions/a2dissite
/usr/share/bash-completion/completions/a2enconf
/usr/share/bash-completion/completions/a2ensite
/usr/share/bug/apache2/control
/usr/share/bug/apache2/script
/usr/share/man/man8/a2disconf.8.gz
/usr/share/man/man8/a2dismod.8.gz
/usr/share/man/man8/a2dissite.8.gz
/usr/share/man/man8/apachectl.8.gz
pi@raspberrypi:~ $
まずは,ホームディレクトリ.htdocsか.
pi@raspberrypi:~ $ tree /var/www🆑
/var/www
└── html
    └── index.html

1 directory, 1 file
pi@raspberrypi:~ $
pi@raspberrypi:~ $ ls -la /var/log/apache2🆑
合計 12
drwxr-x--- 2 root adm  4096  9月  2 01:26 .
drwxr-xr-x 7 root root 4096  9月  2 06:25 ..
-rw-r----- 1 root adm     0  9月  2 01:26 access.log
-rw-r----- 1 root adm  1326  9月  2 01:34 error.log
-rw-r----- 1 root adm     0  9月  2 01:26 other_vhosts_access.log
pi@raspberrypi:~ $
そして,設定ファイル.今回はコメントと空白行を除外して確認.
pi@raspberrypi:~ $ cat /etc/apache2/apache2.conf|grep  -v -e '^\s*#' -e'^\s*$'🆑
DefaultRuntimeDir ${APACHE_RUN_DIR}
PidFile ${APACHE_PID_FILE}
Timeout 300
KeepAlive On
MaxKeepAliveRequests 100
KeepAliveTimeout 5
User ${APACHE_RUN_USER}
Group ${APACHE_RUN_GROUP}
HostnameLookups Off
ErrorLog ${APACHE_LOG_DIR}/error.log
LogLevel warn
IncludeOptional mods-enabled/*.load
IncludeOptional mods-enabled/*.conf
Include ports.conf
<Directory />
	Options FollowSymLinks
	AllowOverride None
	Require all denied
</Directory>
<Directory /usr/share>
	AllowOverride None
	Require all granted
</Directory>
<Directory /var/www/>
	Options Indexes FollowSymLinks
	AllowOverride None
	Require all granted
</Directory>
AccessFileName .htaccess
<FilesMatch "^\.ht">
	Require all denied
</FilesMatch>
LogFormat "%v:%p %h %l %u %t \"%r\" %>s %O \"%{Referer}i\" \"%{User-Agent}i\"" vhost_combined
LogFormat "%h %l %u %t \"%r\" %>s %O \"%{Referer}i\" \"%{User-Agent}i\"" combined
LogFormat "%h %l %u %t \"%r\" %>s %O" common
LogFormat "%{Referer}i -> %U" referer
LogFormat "%{User-agent}i" agent
IncludeOptional conf-enabled/*.conf
IncludeOptional sites-enabled/*.conf
pi@raspberrypi:~ $
Webブラウザでアクセスしてみる.
デフォルトページが表示.アクセスログを確認する.
pi@raspberrypi:~ $ ls -la /var/log/apache2🆑
合計 16
drwxr-x--- 2 root adm  4096  9月  2 01:26 .
drwxr-xr-x 7 root root 4096  9月  2 06:25 ..
-rw-r----- 1 root adm   670  9月  2 18:56 access.log🆑
-rw-r----- 1 root adm  1326  9月  2 01:34 error.log
-rw-r----- 1 root adm     0  9月  2 01:26 other_vhosts_access.log
pi@raspberrypi:~ $
Raspbian 9.4上にMySQL(marinadb)をインストールしてみた その3 ERROR 1698 (28000): Access denied
- カテゴリ :
- PC » Raspberry Pi
- ブロガー :
- ujpblog 2018/9/2 18:26
MySQL(marinadb)にデフォルトの管理者ユーザ,rootにパスワードを設定して,Rasbianに標準で付いている一般ユーザpiでMySQLに接続しようとすると,ERROR 1698 (28000): Access deniedとエラーがでる.
原因はUNIX_SOCKET Authentication Pluginなのだけれど,これを簡単に学んでみる.
まずはエラーの状況を再確認するところから.
OSユーザをrootにスイッチするとアクセスできる.
この原因は,UNIX_SOCKET Authentication Pluginが有効化されているからなのだそうです.
Marnadb 5.2から実装されたこの機能は,Unixソケット経由でMarinaDBへ接続する際に,ユーザがOSの資格情報を利用できる.
プラグインが設定されているか確認.
unix_socketとなっているから,そうなのでしょう.
piユーザを作る
Rasbpianには,現在OSインストールしただけの状態なので,OSアカウントは追加していない.よってrootユーザとpiユーザ程度.なので,piユーザをMySQL(marinaDB)上に作成し,プラグイン状態を確認する.
パスワードを設定したから,プラグインは有効では無い模様.
OSのpiユーザから,MySQLのpiユーザを使って接続してみる.
接続できました.
piユーザを作る(unix_socket対応)
MySQL上でcreate userしたアカウントはデフォルトではパスワード認証となっている,,,というかこれまで通りだとパスワードを設定するわけなので,これをunix_socketベースの認証方法を採用してみる.つまり,OSにpiでログインして入れば,MySQLに接続するときにパスワードが不要ということ.
まずは,rootユーザでmysqlに接続.
先ほどMySQL上に作成した,piユーザを削除して,消えたことを確認.
消えました.次に,unix_socketを使って接続できるpiユーザをMySQLに作成.
作成したpiユーザのプラグインを確認.
unix_socketが設定されていることが確認できました.逆にパスワードは設定されていません.
MySQLモニタを抜けて,OSユーザのpiに戻って,MySQLに接続.
piユーザで接続.
無事に接続できました.
OSユーザが存在しないMySQLユーザを作成する
タイトル通りですが,OSアカウントが存在しないpi2というユーザで,MySQLユーザを作成します.
アカウントが作成されました.piユーザで,pi2ユーザを使って接続して確認します.
パスワードなしで接続できません.次に,パスワードを指定します.
接続できました.
参考資料はこちら
Authentication Plugin - Unix Socket
https://mariadb.com/kb/en/library/authentication-plugin-unix-socket/
原因はUNIX_SOCKET Authentication Pluginなのだけれど,これを簡単に学んでみる.
まずはエラーの状況を再確認するところから.
pi@raspberrypi:~ $ mysql -uroot -p🆑
Enter password:🆑
ERROR 1698 (28000): Access denied for user 'root'@'localhost'🈁
pi@raspberrypi:~ $
pi@raspberrypi:~ $ su root🆑
パスワード:
root@raspberrypi:/home/pi# mysql -uroot -p🆑
Enter password:🆑
Welcome to the MariaDB monitor.  Commands end with ; or \g.
Your MariaDB connection id is 22
Server version: 10.1.35-MariaDB-1 Raspbian testing-staging

Copyright (c) 2000, 2018, Oracle, MariaDB Corporation Ab and others.

Type 'help;' or '\h' for help. Type '\c' to clear the current input statement.

MariaDB [(none)]>
Marnadb 5.2から実装されたこの機能は,Unixソケット経由でMarinaDBへ接続する際に,ユーザがOSの資格情報を利用できる.
プラグインが設定されているか確認.
MariaDB [(none)]> select user,plugin from mysql.user;🆑
+------+-------------+
| user | plugin      |
+------+-------------+
| root | unix_socket |🈁
+------+-------------+
1 row in set (0.00 sec)

MariaDB [(none)]>
piユーザを作る
Rasbpianには,現在OSインストールしただけの状態なので,OSアカウントは追加していない.よってrootユーザとpiユーザ程度.なので,piユーザをMySQL(marinaDB)上に作成し,プラグイン状態を確認する.
MariaDB [(none)]> create user 'pi'@'localhost' identified by 'password';🆑
Query OK, 0 rows affected (0.00 sec)

MariaDB [(none)]> select user,plugin from mysql.user;🆑
+------+-------------+
| user | plugin      |
+------+-------------+
| root | unix_socket |
| pi   |             |
+------+-------------+
2 rows in set (0.00 sec)

MariaDB [(none)]>
OSのpiユーザから,MySQLのpiユーザを使って接続してみる.
pi@raspberrypi:~ $ whoami🆑
pi🈁
pi@raspberrypi:~ $ mysql -upi -p🆑
Enter password:🆑
Welcome to the MariaDB monitor.  Commands end with ; or \g.
Your MariaDB connection id is 25
Server version: 10.1.35-MariaDB-1 Raspbian testing-staging

Copyright (c) 2000, 2018, Oracle, MariaDB Corporation Ab and others.

Type 'help;' or '\h' for help. Type '\c' to clear the current input statement.

MariaDB [(none)]>
piユーザを作る(unix_socket対応)
MySQL上でcreate userしたアカウントはデフォルトではパスワード認証となっている,,,というかこれまで通りだとパスワードを設定するわけなので,これをunix_socketベースの認証方法を採用してみる.つまり,OSにpiでログインして入れば,MySQLに接続するときにパスワードが不要ということ.
まずは,rootユーザでmysqlに接続.
root@raspberrypi:/home/pi# mysql -uroot -p🆑
Enter password:🆑
Welcome to the MariaDB monitor.  Commands end with ; or \g.
Your MariaDB connection id is 27
Server version: 10.1.35-MariaDB-1 Raspbian testing-staging

Copyright (c) 2000, 2018, Oracle, MariaDB Corporation Ab and others.

Type 'help;' or '\h' for help. Type '\c' to clear the current input statement.

MariaDB [(none)]>
MariaDB [(none)]> drop user 'pi'@'localhost';🆑
Query OK, 0 rows affected (0.00 sec)

MariaDB [(none)]> select user,plugin from mysql.user;🆑
+------+-------------+
| user | plugin      |
+------+-------------+
| root | unix_socket |
+------+-------------+
1 row in set (0.01 sec)

MariaDB [(none)]>
MariaDB [(none)]> create user 'pi'@'localhost' identified via unix_socket;🆑
Query OK, 0 rows affected (0.00 sec)

MariaDB [(none)]>
MariaDB [(none)]> select user,plugin,password from mysql.user;🆑
+------+-------------+-------------------------------------------+
| user | plugin      | password                                  |
+------+-------------+-------------------------------------------+
| root | unix_socket | *B6099A7816C8E7B52656686616BA33464BF9AC3B |
| pi   | unix_socket |                                           |
+------+-------------+-------------------------------------------+
2 rows in set (0.00 sec)

MariaDB [(none)]>
MySQLモニタを抜けて,OSユーザのpiに戻って,MySQLに接続.
MariaDB [(none)]> quit🆑
Bye
root@raspberrypi:/home/pi# exit🆑
exit
pi@raspberrypi:~ $ whoami🆑
pi🈁
pi@raspberrypi:~ $
pi@raspberrypi:~ $ mysql -upi🆑
Welcome to the MariaDB monitor.  Commands end with ; or \g.
Your MariaDB connection id is 28
Server version: 10.1.35-MariaDB-1 Raspbian testing-staging

Copyright (c) 2000, 2018, Oracle, MariaDB Corporation Ab and others.

Type 'help;' or '\h' for help. Type '\c' to clear the current input statement.

MariaDB [(none)]> quit🆑
Bye🈁
pi@raspberrypi:~ $
OSユーザが存在しないMySQLユーザを作成する
タイトル通りですが,OSアカウントが存在しないpi2というユーザで,MySQLユーザを作成します.
root@raspberrypi:/home/pi# mysql -uroot -p🆑
Enter password:🆑
Welcome to the MariaDB monitor.  Commands end with ; or \g.
Your MariaDB connection id is 30
Server version: 10.1.35-MariaDB-1 Raspbian testing-staging

Copyright (c) 2000, 2018, Oracle, MariaDB Corporation Ab and others.

Type 'help;' or '\h' for help. Type '\c' to clear the current input statement.

MariaDB [(none)]> create user 'pi2'@'localhost' identified by "password";🆑
Query OK, 0 rows affected (0.00 sec)

MariaDB [(none)]> select user,plugin,password from mysql.user;🆑
+------+-------------+-------------------------------------------+
| user | plugin      | password                                  |
+------+-------------+-------------------------------------------+
| root | unix_socket | *B6099A7816C8E7B52656686616BA33464BF9AC3B |
| pi   | unix_socket |                                           |
| pi2  |             | *B6099A7816C8E7B52656686616BA33464BF9AC3B |🈁
+------+-------------+-------------------------------------------+
3 rows in set (0.00 sec)

MariaDB [(none)]>
MariaDB [(none)]> quit🆑
Bye
root@raspberrypi:/home/pi# exit🆑
exit
pi@raspberrypi:~ $ whoami🆑
pi🈁
pi@raspberrypi:~ $ mysql -upi2🆑
ERROR 1045 (28000): Access denied for user 'pi2'@'localhost' (using password: NO)
pi@raspberrypi:~ $
pi@raspberrypi:~ $ mysql -upi2 -p🆑
Enter password:🆑
Welcome to the MariaDB monitor.  Commands end with ; or \g.
Your MariaDB connection id is 31
Server version: 10.1.35-MariaDB-1 Raspbian testing-staging

Copyright (c) 2000, 2018, Oracle, MariaDB Corporation Ab and others.

Type 'help;' or '\h' for help. Type '\c' to clear the current input statement.

MariaDB [(none)]> quit🆑
Bye
pi@raspberrypi:~ $
参考資料はこちら
Authentication Plugin - Unix Socket
https://mariadb.com/kb/en/library/authentication-plugin-unix-socket/
Raspbian 9.4上にMySQL(marinadb)をインストールしてみた その2 rootユーザのパスワード設定
- カテゴリ :
- PC » Raspberry Pi
- ブロガー :
- ujpblog 2018/9/2 17:35
MySQL(mariadb)が起動していることを確認.
MySQL Monitorを使い,管理者ユーザのrootでアクセスする.パスワードは設定されてない.
接続できました.
MySQL Monitorから一旦切断して,mysqladminコマンドを使ってパスワードを設定する.
この場合,rootユーザのパスワードはnew-passwordに変更された.パスワードリクエストを入れて接続してみる.
パスワード入れて接続できました.
mysqlデータベースにあるユーザテーブルを確認してみる.
現在はOSユーザをrootで接続しているので,RaspbianのOSユーザpiユーザで接続してみる.
アクセスできない.困りますな..
root@raspberrypi:/home/pi# service mysql status🆑
● mariadb.service - MariaDB 10.1.35 database server
   Loaded: loaded (/lib/systemd/system/mariadb.service; enabled; vendor preset: enabled)
   Active: active (running)🈁 since Sun 2018-09-02 02:29:36 JST; 12h ago
     Docs: man:mysqld(8)
           https://mariadb.com/kb/en/library/systemd/
  Process: 3607 ExecStartPost=/bin/sh -c systemctl unset-environment _WSREP_START_POSITION (code=exited, s
  Process: 3605 ExecStartPost=/etc/mysql/debian-start (code=exited, status=0/SUCCESS)
  Process: 3479 ExecStartPre=/bin/sh -c [ ! -e /usr/bin/galera_recovery ] && VAR= ||   VAR=`/usr/bin/galer
  Process: 3475 ExecStartPre=/bin/sh -c systemctl unset-environment _WSREP_START_POSITION (code=exited, st
  Process: 3472 ExecStartPre=/usr/bin/install -m 755 -o mysql -g root -d /var/run/mysqld (code=exited, sta
 Main PID: 3578 (mysqld)
   Status: "Taking your SQL requests now..."
   CGroup: /system.slice/mariadb.service
           └─3578 /usr/sbin/mysqld

 9月 02 02:29:33 raspberrypi systemd[1]: Starting MariaDB 10.1.35 database server...
 9月 02 02:29:35 raspberrypi mysqld[3578]: 2018-09-02  2:29:35 1996419088 [Note] /usr/sbin/mysqld (mysqld 1
 9月 02 02:29:36 raspberrypi systemd[1]: Started MariaDB 10.1.35 database server.
root@raspberrypi:/home/pi#
root@raspberrypi:/home/pi# mysql -uroot🆑
Welcome to the MariaDB monitor.  Commands end with ; or \g.
Your MariaDB connection id is 2
Server version: 10.1.35-MariaDB-1 Raspbian testing-staging

Copyright (c) 2000, 2018, Oracle, MariaDB Corporation Ab and others.

Type 'help;' or '\h' for help. Type '\c' to clear the current input statement.

MariaDB [(none)]>
MySQL Monitorから一旦切断して,mysqladminコマンドを使ってパスワードを設定する.
MariaDB [(none)]> quit🆑
Bye🈁
root@raspberrypi:/home/pi#
root@raspberrypi:/home/pi# mysqladmin -u root password 'new-password'🆑
root@raspberrypi:/home/pi#
root@raspberrypi:/home/pi# mysql -uroot -p🆑
Enter password:🈁
Welcome to the MariaDB monitor.  Commands end with ; or \g.
Your MariaDB connection id is 12
Server version: 10.1.35-MariaDB-1 Raspbian testing-staging

Copyright (c) 2000, 2018, Oracle, MariaDB Corporation Ab and others.

Type 'help;' or '\h' for help. Type '\c' to clear the current input statement.

MariaDB [(none)]>
root@raspberrypi:/home/pi#
mysqlデータベースにあるユーザテーブルを確認してみる.
MariaDB [(none)]> use mysq🆑
Reading table information for completion of table and column names
You can turn off this feature to get a quicker startup with -A

Database changed🈁
MariaDB [mysql]> select user,host,password from user;🆑
+------+-----------+-------------------------------------------+
| user | host      | password                                  |
+------+-----------+-------------------------------------------+
| root | localhost | *B6099A7816C886616E7B526566BA33464BF9AC3B |
+------+-----------+-------------------------------------------+
1 row in set (0.00 sec)

MariaDB [mysql]>
MariaDB [mysql]> quit🆑
Bye
root@raspberrypi:/home/pi# exit🆑
exit
pi@raspberrypi:~ $ whoami🆑
pi🈁
pi@raspberrypi:~ $ mysql -uroot -p🆑
Enter password:
ERROR 1698 (28000): Access denied for user 'root'@'localhost'🈁
pi@raspberrypi:~ $
PHPからMySQLにアクセスするためのライブラリをインストールする.まずは,関連パッケージを探す.
パッケージ名がわかったので,インストール.
root@raspberrypi:/home/pi# apt-cache search php7.2|grep mysql🆑
php7.2-mysql - MySQL module for PHP
root@raspberrypi:/home/pi#
root@raspberrypi:/home/pi# apt-get install php7.2-mysql🆑
パッケージリストを読み込んでいます... 完了
依存関係ツリーを作成しています
状態情報を読み取っています... 完了
以下のパッケージが自動でインストールされましたが、もう必要とされていません:
  libperl5.24 perl-modules-5.24 rename
これを削除するには 'apt autoremove' を利用してください。
以下のパッケージが新たにインストールされます:
  php7.2-mysql
アップグレード: 0 個、新規インストール: 1 個、削除: 0 個、保留: 877 個。
97.3 kB のアーカイブを取得する必要があります。
この操作後に追加で 358 kB のディスク容量が消費されます。
取得:1 http://ftp.tsukuba.wide.ad.jp/Linux/raspbian/raspbian buster/main armhf
 php7.2-mysql armhf 7.2.9-1 [97.3 kB]
97.3 kB を 0秒 で取得しました (116 kB/s)
以前に未選択のパッケージ php7.2-mysql を選択しています。
(データベースを読み込んでいます ... 現在 109425 個のファイルとディレクトリが
インストールされています。)
.../php7.2-mysql_7.2.9-1_armhf.deb を展開する準備をしています ...
php7.2-mysql (7.2.9-1) を展開しています...
php7.2-mysql (7.2.9-1) を設定しています ...

Creating config file /etc/php/7.2/mods-available/mysqlnd.ini with new version

Creating config file /etc/php/7.2/mods-available/mysqli.ini with new version

Creating config file /etc/php/7.2/mods-available/pdo_mysql.ini with new version
libapache2-mod-php7.2 (7.2.9-1) のトリガを処理しています ...
root@raspberrypi:/home/pi#
さらっとインストールされたのだけれど,実は自動起動している.その状態を確認.
active (running)となっていて動いていることが確認.
停止して,再度ステータスを確認してみる.
停止されてますね.deadだなんて...
今度は起動してステータスを確認.
あっさり目ですね.
root@raspberrypi:/home/pi# sudo service mysql status🆑
● mariadb.service - MariaDB 10.1.35 database server
   Loaded: loaded (/lib/systemd/system/mariadb.service; enabled; vendor preset: enabled)
   Active: active (running)🈁 since Sun 2018-09-02 01:59:41 JST; 25min ago
     Docs: man:mysqld(8)
           https://mariadb.com/kb/en/library/systemd/
 Main PID: 3235 (mysqld)
   Status: "Taking your SQL requests now..."
   CGroup: /system.slice/mariadb.service
           └─3235 /usr/sbin/mysqld

 9月 02 01:59:38 raspberrypi systemd[1]: Starting MariaDB 10.1.35 database server...
 9月 02 01:59:40 raspberrypi mysqld[3235]: 2018-09-02  1:59:40 1996025872 [Note] /usr/sbin/mysqld (mysqld 1
 9月 02 01:59:41 raspberrypi systemd[1]: Started MariaDB 10.1.35 database server.
root@raspberrypi:/home/pi#
停止して,再度ステータスを確認してみる.
root@raspberrypi:/home/pi# sudo service mysql stop🆑
root@raspberrypi:/home/pi#
root@raspberrypi:/home/pi# sudo service mysql status🆑
● mariadb.service - MariaDB 10.1.35 database server
   Loaded: loaded (/lib/systemd/system/mariadb.service; enabled; vendor preset: enabled)
   Active: inactive (dead)🈁 since Sun 2018-09-02 02:27:59 JST; 3s ago
     Docs: man:mysqld(8)
           https://mariadb.com/kb/en/library/systemd/
 Main PID: 3235 (code=exited, status=0/SUCCESS)
   Status: "MariaDB server is down"

 9月 02 01:59:38 raspberrypi systemd[1]: Starting MariaDB 10.1.35 database server...
 9月 02 01:59:40 raspberrypi mysqld[3235]: 2018-09-02  1:59:40 1996025872 [Note] /usr/sbin/mysqld (mysqld 1
 9月 02 01:59:41 raspberrypi systemd[1]: Started MariaDB 10.1.35 database server.
 9月 02 02:27:57 raspberrypi systemd[1]: Stopping MariaDB 10.1.35 database server...
 9月 02 02:27:59 raspberrypi systemd[1]: Stopped MariaDB 10.1.35 database server.
root@raspberrypi:/home/pi#
今度は起動してステータスを確認.
root@raspberrypi:/home/pi# sudo service mysql start🆑
root@raspberrypi:/home/pi#
root@raspberrypi:/home/pi# sudo service mysql status🆑
● mariadb.service - MariaDB 10.1.35 database server
   Loaded: loaded (/lib/systemd/system/mariadb.service; enabled; vendor preset: enabled)
   Active: active (running) since Sun 2018-09-02 02:29:36 JST; 4s ago
     Docs: man:mysqld(8)
           https://mariadb.com/kb/en/library/systemd/
  Process: 3607 ExecStartPost=/bin/sh -c systemctl unset-environment _WSREP_START_POSITION (code=exited, s
  Process: 3605 ExecStartPost=/etc/mysql/debian-start (code=exited, status=0/SUCCESS)
  Process: 3479 ExecStartPre=/bin/sh -c [ ! -e /usr/bin/galera_recovery ] && VAR= ||   VAR=`/usr/bin/galer
  Process: 3475 ExecStartPre=/bin/sh -c systemctl unset-environment _WSREP_START_POSITION (code=exited, st
  Process: 3472 ExecStartPre=/usr/bin/install -m 755 -o mysql -g root -d /var/run/mysqld (code=exited, sta
 Main PID: 3578 (mysqld)
   Status: "Taking your SQL requests now..."
   CGroup: /system.slice/mariadb.service
           └─3578 /usr/sbin/mysqld

 9月 02 02:29:33 raspberrypi systemd[1]: Starting MariaDB 10.1.35 database server...
 9月 02 02:29:35 raspberrypi mysqld[3578]: 2018-09-02  2:29:35 1996419088 [Note] /usr/sbin/mysqld (mysqld 1
 9月 02 02:29:36 raspberrypi systemd[1]: Started MariaDB 10.1.35 database server.
root@raspberrypi:/home/pi#
MySQLサーバをインストールしてみようと.パッケージを探す.
なぜかmariadbがでてくる.気にせずに,mysql-serverをインストール.
エラーで停止.default-mysql-serverを先に入れろというので,インストールする.
んー.どういうことか,mariadb-server-10.1を入れるってことになっている.最近の事情に疎いのだけれど,またOracle関係でもめているのかなぁ.
Yを押して続ける.
なんかいろいろと変わったのかな.覚えるのもしんどいなぁ.
root@raspberrypi:/home/pi# apt-cache search mysql-server🆑
auth2db - Powerful and eye-candy IDS logger, log viewer and alert generator
default-mysql-server - MySQL database server binaries and system database setup (metapackage)
default-mysql-server-core - MySQL database server binaries (metapackage)
mariadb-server-10.0 - MariaDB database server binaries
mariadb-server-10.1 - MariaDB database server binaries
mariadb-server-core-10.0 - MariaDB database core server files
mariadb-server-core-10.1 - MariaDB database core server files
mysql-server - MySQL database server binaries and system database setup [transitional]
torrentflux - web based, feature-rich BitTorrent download manager
root@raspberrypi:/home/pi#
root@raspberrypi:/home/pi# apt-get install mysql-server🆑
パッケージリストを読み込んでいます... 完了
依存関係ツリーを作成しています
状態情報を読み取っています... 完了
インストールすることができないパッケージがありました。おそらく、あり得
ない状況を要求したか、(不安定版ディストリビューションを使用しているの
であれば) 必要なパッケージがまだ作成されていなかったり Incoming から移
動されていないことが考えられます。
以下の情報がこの問題を解決するために役立つかもしれません:

以下のパッケージには満たせない依存関係があります:
 mysql-server : 依存: default-mysql-server しかし、インストールされようとしていません
E: 問題を解決することができません。壊れた変更禁止パッケージがあります。
root@raspberrypi:/home/pi#
root@raspberrypi:/home/pi# apt-get install default-mysql-server🆑
パッケージリストを読み込んでいます... 完了
依存関係ツリーを作成しています
状態情報を読み取っています... 完了
以下のパッケージが自動でインストールされましたが、もう必要とされていません:
  libperl5.24 perl-modules-5.24 rename
これを削除するには 'apt autoremove' を利用してください。
以下の追加パッケージがインストールされます:
  galera-3 gawk libaio1 libalgorithm-diff-xs-perl libcgi-fast-perl libcgi-pm-perl
  libconfig-inifiles-perl libdbd-mysql-perl libdbi-perl libencode-locale-perl libfcgi-perl
  libfile-fcntllock-perl libgdbm-compat4 libhtml-parser-perl libhtml-tagset-perl libhtml-template-perl
  libhttp-date-perl libhttp-message-perl libio-html-perl libjemalloc1 liblocale-gettext-perl
  liblwp-mediatypes-perl libmariadbclient18 libmpc3 libmpfr6 libperl5.26 libreadline5 libsigsegv2
  libterm-readkey-perl libtext-charwidth-perl libtext-iconv-perl libtimedate-perl liburi-perl lsof
  mariadb-client-10.1 mariadb-client-core-10.1 mariadb-common mariadb-server-10.1
  mariadb-server-core-10.1 mysql-common perl perl-base perl-modules-5.26 socat
提案パッケージ:
  gawk-doc libclone-perl libmldbm-perl libnet-daemon-perl libsql-statement-perl libdata-dump-perl
  libipc-sharedcache-perl libwww-perl mailx mariadb-test tinyca perl-doc libterm-readline-gnu-perl
  | libterm-readline-perl-perl
以下のパッケージが新たにインストールされます:
  default-mysql-server galera-3 gawk libaio1 libcgi-fast-perl libcgi-pm-perl libconfig-inifiles-perl
  libdbd-mysql-perl libdbi-perl libencode-locale-perl libfcgi-perl libgdbm-compat4 libhtml-parser-perl
  libhtml-tagset-perl libhtml-template-perl libhttp-date-perl libhttp-message-perl libio-html-perl
  libjemalloc1 liblwp-mediatypes-perl libmariadbclient18 libmpfr6 libperl5.26 libreadline5 libsigsegv2
  libterm-readkey-perl libtimedate-perl liburi-perl lsof mariadb-client-10.1 mariadb-client-core-10.1
  mariadb-common mariadb-server-10.1 mariadb-server-core-10.1 mysql-common perl-modules-5.26 socat
以下のパッケージはアップグレードされます:
  libalgorithm-diff-xs-perl libfile-fcntllock-perl liblocale-gettext-perl libmpc3 libtext-charwidth-perl
  libtext-iconv-perl perl perl-base
アップグレード: 8 個、新規インストール: 37 個、削除: 0 個、保留: 877 個。
26.5 MB のアーカイブを取得する必要があります。
この操作後に追加で 187 MB のディスク容量が消費されます。
続行しますか? [Y/n]
Yを押して続ける.
libhttp-message-perl (6.18-1) を設定しています ...
mariadb-server-10.1 (1:10.1.35-1) を設定しています ...
Created symlink /etc/systemd/system/mysql.service → /lib/systemd/system/mariadb.service.
Created symlink /etc/systemd/system/mysqld.service → /lib/systemd/system/mariadb.service.
Created symlink /etc/systemd/system/multi-user.target.wants/mariadb.service → /lib/systemd/system/mariadb.service.
default-mysql-server (1.0.4) を設定しています ...
libc-bin (2.27-5+rpi1) のトリガを処理しています ...
systemd (232-25+deb9u4) のトリガを処理しています ...
root@raspberrypi:/home/pi#
最新のPHP7.2をパッケージマネージャから入れようとしたら,次のようになった.
現在設定だとパッケージマネージャに登録されてないのだけれど,次のように設定すればRaspbian公式サイトからダウンロードできるって.
現在のRaspbian 9.4 ディストリビューションはコードネームstretchなんだけれど,次のBusterというバージョン用にPHP7.2が用意されているので,そのリポジトリを追加する.
表記上の制限で,2行に分かれているので注意.
追加された設定を確認してみる.
設定を追加したので,パッケージリストを更新する.
パッケージからPHP7.2を検索.
いろいろ用意されていることを確認.
インストールする.
OSを入れた後何もしてない状態なので,依存関係のあるパッケージが入ってないもが多い模様.また,apt autoremoveとすれば掃除もしてくれる模様.
yを入れて実行.そしてしばらくすると,次のような画面が.
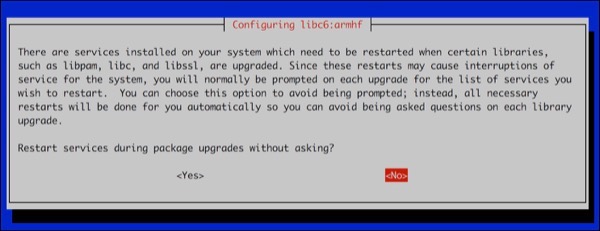
アップデートするときに再起動が必要なライブラリがありますよ,という警告.カーソルキーでyesを選んで進む.
しばらくすると,次のようにプロンプトがでて終了.
バージョンを確認.
とりあえず新しいものになった模様.再起動しておく.
再起動が終わったら,掃除を実行.
とりあえず必要そうなものはないので,掃除を実行.
お疲れさまでした.
pi@raspberrypi:~ $ apt-cache search php7.2🆑
pi@raspberrypi:~ $
root@raspberrypi:~# cat /etc/apt/sources.list🆑
deb http://raspbian.raspberrypi.org/raspbian/ stretch main contrib non-free rpi
# Uncomment line below then 'apt-get update' to enable 'apt-get source'
#deb-src http://raspbian.raspberrypi.org/raspbian/ stretch main contrib non-free rpi
root@raspberrypi:~#
root@raspberrypi:~# echo deb http://mirrordirector.raspbian.org/raspbian/
 buster main contrib non-free rpi >> /etc/apt/sources.list🆑
root@raspberrypi:~#
追加された設定を確認してみる.
root@raspberrypi:~# cat /etc/apt/sources.list🆑
deb http://raspbian.raspberrypi.org/raspbian/ stretch main contrib non-free rpi
# Uncomment line below then 'apt-get update' to enable 'apt-get source'
#deb-src http://raspbian.raspberrypi.org/raspbian/ stretch main contrib non-free rpi
deb http://mirrordirector.raspbian.org/raspbian/ buster main contrib non-free rpi🈁
root@raspberrypi:~#
root@raspberrypi:~# sudo apt-get update🆑
ヒット:1 http://raspbian.raspberrypi.org/raspbian stretch InRelease
ヒット:2 http://archive.raspberrypi.org/debian stretch InRelease
取得:3 http://mirrordirector.raspbian.org/raspbian buster InRelease [15.0 kB]
取得:4 http://mirrordirector.raspbian.org/raspbian buster/main armhf Packages [12.7 MB]
取得:5 http://mirrordirector.raspbian.org/raspbian buster/contrib armhf Packages [58.9 kB]
取得:6 http://mirrordirector.raspbian.org/raspbian buster/non-free armhf Packages [102 kB]
取得:7 http://mirrordirector.raspbian.org/raspbian buster/rpi armhf Packages [1,360 B]
12.9 MB を 3分 7秒 で取得しました (68.8 kB/s)
パッケージリストを読み込んでいます... 完了
root@raspberrypi:~#
root@raspberrypi:~# apt-cache search php7.2🆑
php-amqp - AMQP extension for PHP
php-apcu - APC User Cache for PHP
php-geoip - GeoIP module for PHP
php-gmagick - Provides a wrapper to the GraphicsMagick library
php-gnupg - PHP wrapper around the gpgme library
php-imagick - Provides a wrapper to the ImageMagick library
php-mailparse - Email message manipulation for PHP
php-memcache - memcache extension module for PHP
php-mongodb - MongoDB driver for PHP
php-msgpack - PHP extension for interfacing with MessagePack
php-oauth - OAuth 1.0 consumer and provider extension
php-propro - propro module for PHP
php-radius - radius client library for PHP
php-raphf - raphf module for PHP
php-rrd - PHP bindings to rrd tool system
php-smbclient - PHP wrapper for libsmbclient
php-solr - PHP extension for communicating with Apache Solr server
php-ssh2 - Bindings for the libssh2 library
php-stomp - Streaming Text Oriented Messaging Protocol (STOMP) client module for PHP
php-tideways - Tideways PHP Profiler Extension
php-uploadprogress - file upload progress tracking extension for PHP
php-uuid - PHP UUID extension
php-xdebug - Xdebug Module for PHP
php-yac - YAC (Yet Another Cache) for PHP
libapache2-mod-php7.2 - server-side, HTML-embedded scripting language (Apache 2 module)
libphp7.2-embed - HTML-embedded scripting language (Embedded SAPI library)
php-all-dev - package depending on all supported PHP development packages
php-ds - PHP extension providing efficient data structures for PHP 7
php-sass - PHP bindings to libsass - fast, native Sass parsing in PHP
php7.2 - server-side, HTML-embedded scripting language (metapackage)
php7.2-bcmath - Bcmath module for PHP
php7.2-bz2 - bzip2 module for PHP
php7.2-cgi - server-side, HTML-embedded scripting language (CGI binary)
php7.2-cli - command-line interpreter for the PHP scripting language
php7.2-common - documentation, examples and common module for PHP
php7.2-curl - CURL module for PHP
php7.2-dba - DBA module for PHP
php7.2-dev - Files for PHP7.2 module development
php7.2-enchant - Enchant module for PHP
php7.2-fpm - server-side, HTML-embedded scripting language (FPM-CGI binary)
php7.2-gd - GD module for PHP
php7.2-gmp - GMP module for PHP
php7.2-imap - IMAP module for PHP
php7.2-interbase - Interbase module for PHP
php7.2-intl - Internationalisation module for PHP
php7.2-json - JSON module for PHP
php7.2-ldap - LDAP module for PHP
php7.2-mbstring - MBSTRING module for PHP
php7.2-mysql - MySQL module for PHP
php7.2-odbc - ODBC module for PHP
php7.2-opcache - Zend OpCache module for PHP
php7.2-pgsql - PostgreSQL module for PHP
php7.2-phpdbg - server-side, HTML-embedded scripting language (PHPDBG binary)
php7.2-pspell - pspell module for PHP
php7.2-readline - readline module for PHP
php7.2-recode - recode module for PHP
php7.2-snmp - SNMP module for PHP
php7.2-soap - SOAP module for PHP
php7.2-sqlite3 - SQLite3 module for PHP
php7.2-sybase - Sybase module for PHP
php7.2-tidy - tidy module for PHP
php7.2-xml - DOM, SimpleXML, WDDX, XML, and XSL module for PHP
php7.2-xmlrpc - XMLRPC-EPI module for PHP
php7.2-xsl - XSL module for PHP (dummy)
php7.2-zip - Zip module for PHP
root@raspberrypi:~#
インストールする.
root@raspberrypi:~# apt-get install php7.2🆑
パッケージリストを読み込んでいます... 完了
依存関係ツリーを作成しています
状態情報を読み取っています... 完了
以下のパッケージが自動でインストールされましたが、もう必要とされていません:
  coinor-libipopt1v5 libexiv2-14 libgmime-2.6-0 libgpgme11 libmumps-seq-4.10.0 libraw15 netsurf-common
  wolframscript
これを削除するには 'apt autoremove' を利用してください。🈁
以下の追加パッケージがインストールされます:
  apache2 apache2-bin apache2-data apache2-utils curl libapache2-mod-php7.2 libapr1 libaprutil1
  libaprutil1-dbd-sqlite3 libaprutil1-ldap libargon2-1 libbrotli1 libc-bin libc-dev-bin libc-l10n libc6
  libc6-dbg libc6-dev libcom-err2 libcomerr2 libcurl4 libgdbm5 libjansson4 liblua5.2-0 libncurses6
  libnih-dbus1 libnih1 libsodium23 libtinfo6 locales php-common php7.2-cli php7.2-common php7.2-json
  php7.2-opcache php7.2-readline ssl-cert
提案パッケージ:
  apache2-doc apache2-suexec-pristine | apache2-suexec-custom php-pear glibc-doc gdbm-l10n
  openssl-blacklist
以下のパッケージは「削除」されます:
  libcurl3 netsurf-gtk wolfram-engine
以下のパッケージが新たにインストールされます:
  apache2 apache2-bin apache2-data apache2-utils libapache2-mod-php7.2 libapr1 libaprutil1
  libaprutil1-dbd-sqlite3 libaprutil1-ldap libargon2-1 libbrotli1 libcom-err2 libcurl4 libgdbm5
  libjansson4 liblua5.2-0 libncurses6 libsodium23 libtinfo6 php-common php7.2 php7.2-cli php7.2-common
  php7.2-json php7.2-opcache php7.2-readline ssl-cert
以下のパッケージはアップグレードされます:
  curl libc-bin libc-dev-bin libc-l10n libc6 libc6-dbg libc6-dev libcomerr2 libnih-dbus1 libnih1 locales
アップグレード: 11 個、新規インストール: 27 個、削除: 3 個、保留: 889 個。🈁
26.5 MB のアーカイブを取得する必要があります。
この操作後に 805 MB のディスク容量が解放されます。
続行しますか? [Y/n]
yを入れて実行.そしてしばらくすると,次のような画面が.
アップデートするときに再起動が必要なライブラリがありますよ,という警告.カーソルキーでyesを選んで進む.
しばらくすると,次のようにプロンプトがでて終了.
Setting up php7.2-cli (7.2.9-1) ...
update-alternatives: /usr/bin/php (php) を提供するために自動モードで
 /usr/bin/php7.2 を使います
update-alternatives: /usr/bin/phar (phar) を提供するために自動モードで
 /usr/bin/phar7.2 を使います
update-alternatives: /usr/bin/phar.phar (phar.phar) を提供するために自動モードで
 /usr/bin/phar.phar7.2 を使います

Creating config file /etc/php/7.2/cli/php.ini with new version
Setting up libapache2-mod-php7.2 (7.2.9-1) ...

Creating config file /etc/php/7.2/apache2/php.ini with new version
Module mpm_event disabled.
Enabling module mpm_prefork.
apache2_switch_mpm Switch to prefork
apache2_invoke: Enable module php7.2
Setting up php7.2 (7.2.9-1) ...
Processing triggers for libc-bin (2.27-5+rpi1) ...
Processing triggers for systemd (232-25+deb9u4) ...
root@raspberrypi:~#
root@raspberrypi:~# php -v🆑
PHP 7.2.9-1 (cli) (built: Aug 19 2018 06:56:13) ( NTS )
Copyright (c) 1997-2018 The PHP Group
Zend Engine v3.2.0, Copyright (c) 1998-2018 Zend Technologies
    with Zend OPcache v7.2.9-1, Copyright (c) 1999-2018, by Zend Technologies
root@raspberrypi:~#
再起動が終わったら,掃除を実行.
root@raspberrypi:/home/pi# apt autoremove🆑
パッケージリストを読み込んでいます... 完了
依存関係ツリーを作成しています
状態情報を読み取っています... 完了
以下のパッケージは「削除」されます:
  coinor-libipopt1v5 libexiv2-14 libgmime-2.6-0 libgpgme11 libmumps-seq-4.10.0 libraw15 netsurf-common
  wolframscript
アップグレード: 0 個、新規インストール: 0 個、削除: 8 個、保留: 885 個。
この操作後に 16.8 MB のディスク容量が解放されます。
続行しますか? [Y/n]🈁
続行しますか? [Y/n] y🆑
(データベースを読み込んでいます ... 現在 106639 個のファイルとディレクトリが
インストールされています。)
coinor-libipopt1v5 (3.11.9-2.1) を削除しています ...
libexiv2-14:armhf (0.25-3.1+deb9u1) を削除しています ...
libgmime-2.6-0:armhf (2.6.22+dfsg2-1) を削除しています ...
libgpgme11:armhf (1.8.0-3) を削除しています ...
libmumps-seq-4.10.0 (4.10.0.dfsg-4+b1) を削除しています ...
libraw15:armhf (0.17.2-6+deb9u1) を削除しています ...
netsurf-common (3.6-3.1) を削除しています ...
wolframscript (1.2.0-18) を削除しています ...
libc-bin (2.27-5+rpi1) のトリガを処理しています ...
man-db (2.7.6.1-2) のトリガを処理しています ...
shared-mime-info (1.8-1+deb9u1) のトリガを処理しています ...
hicolor-icon-theme (0.15-1) のトリガを処理しています ...
root@raspberrypi:/home/pi#
Raspberry Pi Raspbianのバージョンを確認する lsb-releaseで詳細情報を取得
- カテゴリ :
- PC » Raspberry Pi
- ブロガー :
- ujpblog 2018/9/2 1:03
最新のNOOBSからインストールしたのだけれど,現在状態がなんなのか,確認してみる.
まずはカーネルの情報.
Raspbianの元となっているDebianの情報.
イシューからも確認できるというので.
詳細バージョンまではわからない模様.
lsb-releaseというパッケージをインストールすることで,詳細情報を取得できるというので早速入れて見た.
そして情報確認.
ちなみに,-aをつけると全部の情報なので,このコマンドでわかるのはここまで...
まずはカーネルの情報.
pi@raspberrypi:~ $ uname -a🆑
Linux raspberrypi 4.14.67-v7+ #1139 SMP Wed Aug 29 15:17:05 BST 2018 armv7l GNU/Linux
pi@raspberrypi:~ $
pi@raspberrypi:~ $ cat /etc/debian_version🆑
9.4
pi@raspberrypi:~ $
pi@raspberrypi:~ $  cat /etc/issue🆑
Raspbian GNU/Linux 9 \n \l
pi@raspberrypi:~ $
lsb-releaseというパッケージをインストールすることで,詳細情報を取得できるというので早速入れて見た.
pi@raspberrypi:~ $  sudo apt-get install lsb-release🆑
パッケージリストを読み込んでいます... 完了
依存関係ツリーを作成しています
状態情報を読み取っています... 完了
提案パッケージ:
  lsb
以下のパッケージはアップグレードされます:
  lsb-release
アップグレード: 1 個、新規インストール: 0 個、削除: 0 個、保留: 900 個。
27.4 kB のアーカイブを取得する必要があります。
この操作後に追加で 0 B のディスク容量が消費されます。
取得:1 http://ftp.tsukuba.wide.ad.jp/Linux/raspbian/raspbian buster/main armhf
 lsb-release all 9.20170808+rpi1 [27.4 kB]
27.4 kB を 0秒 で取得しました (37.3 kB/s)
changelog を読んでいます... 完了
(データベースを読み込んでいます ...
現在 115966 個のファイルとディレクトリがインストールされています。)
.../lsb-release_9.20170808+rpi1_all.deb を展開する準備をしています ...
lsb-release (9.20170808+rpi1) で (9.20161125+rpi1 に) 上書き展開しています ...
lsb-release (9.20170808+rpi1) を設定しています ...
man-db (2.7.6.1-2) のトリガを処理しています ...
pi@raspberrypi:~ $ lsb_release -a🆑
No LSB modules are available.
Distributor ID:	Raspbian
Description:	Raspbian GNU/Linux 9.4 (stretch)
Release:	9.4
Codename:	stretch
pi@raspberrypi:~ $
季節の変わり目と同じように,またいじりたくなったRaspberry Pi 3ですが,今回は初めて拡張してみます.
今回購入したのは3.5インチのディスプレイ.Amazonで3320円.1インチあたり1000円程度か.
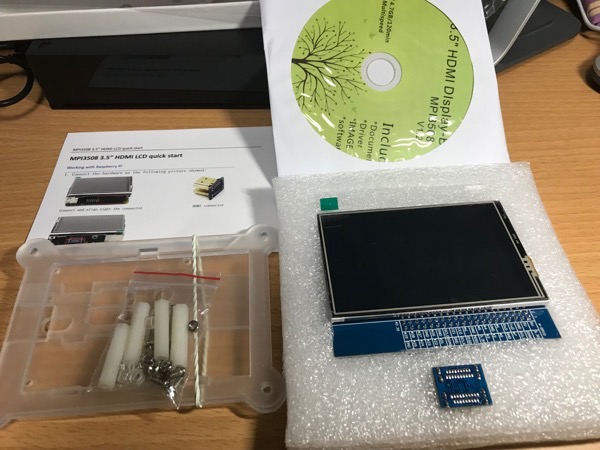
箱の中身は,本体とHDMIアダプタ,ケースとドライバCDです.
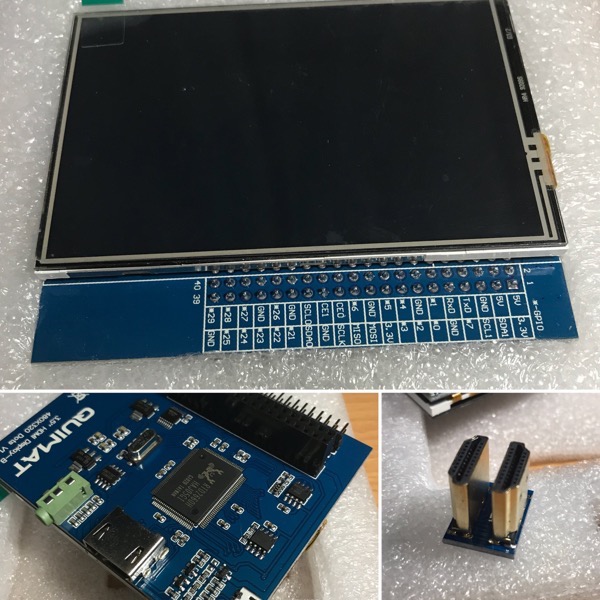
このLEDの良いところは,汎用入出力ポートのGPIOに挿すと電力供給が行われることと,塞がれたGPIOポートは横に延長されるので拡張性を犠牲にしないという2点ですね.そういうネットの説明を見てまぁ素敵!とは思わなかったけれど,ただ3.5インチの液晶が欲しかっただけ.
傑作は,このHDMIケーブル?アダプタですね.最短で繋いでいる.こういうの好き.
液晶をRaspberry Piに接続してみて四方から写真を撮ってみました.

GPIOポートを横に出しているだけ,横に広がっていますね.これだと公式ケースだと入らない.
NOOBS_v2_8_2.zipをダウンロードして展開したmicroSDカードをセットして電源オン.
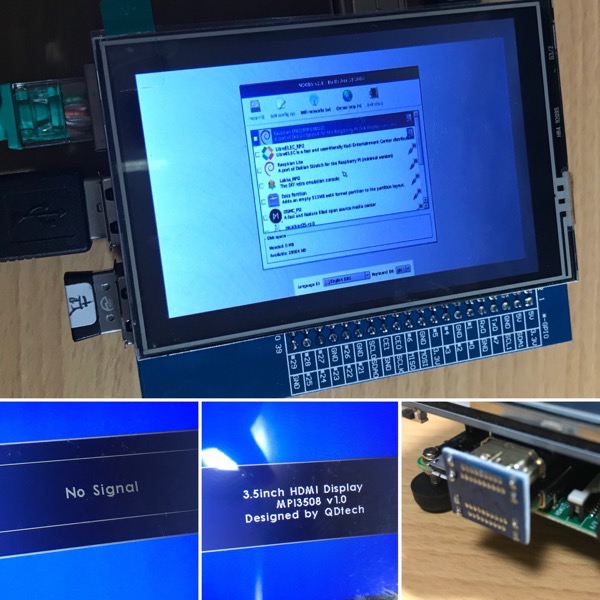
一応表示されているけれど,このままだとセットアップは視力との戦いで無理ですが,問題なく動きました.
ドライバを入れるとタッチパネルになるそうですが,そこはあまり興味なくて.
今回購入したのは3.5インチのディスプレイ.Amazonで3320円.1インチあたり1000円程度か.
箱の中身は,本体とHDMIアダプタ,ケースとドライバCDです.
このLEDの良いところは,汎用入出力ポートのGPIOに挿すと電力供給が行われることと,塞がれたGPIOポートは横に延長されるので拡張性を犠牲にしないという2点ですね.そういうネットの説明を見てまぁ素敵!とは思わなかったけれど,ただ3.5インチの液晶が欲しかっただけ.
傑作は,このHDMIケーブル?アダプタですね.最短で繋いでいる.こういうの好き.
液晶をRaspberry Piに接続してみて四方から写真を撮ってみました.
GPIOポートを横に出しているだけ,横に広がっていますね.これだと公式ケースだと入らない.
NOOBS_v2_8_2.zipをダウンロードして展開したmicroSDカードをセットして電源オン.
一応表示されているけれど,このままだとセットアップは視力との戦いで無理ですが,問題なく動きました.
ドライバを入れるとタッチパネルになるそうですが,そこはあまり興味なくて.
Raspberry Pi OSインストール Macで NOOBS_v2_8_2.zipを使って
- カテゴリ :
- PC » Raspberry Pi
- ブロガー :
- ujpblog 2018/8/29 23:26
ダウンロードしたファイルを確認.
1.5GBか.アーカイブファイルを展開する.
念のためファイルを確認.
Raspberry PiはOSをmicroSDカードに入れるので,macOSでフォーマットする.その前にまずはデバイス番号を確認.
この32GBのデバイスが今回の対象.決して,見間違わないようにしてください.
フォーマットします.この先は実行確認とかないのでスパッとデータが消えます! ボリューム名をRP3(Raspberry Pi 3の略)としてフォーマット.
RP3としてディスクが作られているのを確認.
若干不要なファイルがあるものの,確認できた.ここに,ZIPファイルを展開したデータをコピーする.
コピーには数分程度必要.
コピーできたら,microSDカードを取り出して,Raspberry Piに挿入し,電源を入れて起動すれば初期設定が行われる.
$ cd raspbian/🆑
$ ls -la🆑
total 1541584
drwxr-xr-x   3 ujpadmin staff         96  8 29 23:17 .
drwx------+ 29 ujpadmin staff        928  8 29 23:17 ..
-rw-r--r--   1 ujpadmin staff 1578581326  6 28 23:20 NOOBS_v2_8_2.zip
$ ls -lah🆑
total 1.5G
drwxr-xr-x   3 ujpadmin staff   96  8 29 23:17 .
drwx------+ 29 ujpadmin staff  928  8 29 23:17 ..
-rw-r--r--   1 ujpadmin staff 1.5G  6 28 23:20 NOOBS_v2_8_2.zip🈁
$
$ unzip NOOBS_v2_8_2.zip🆑
Archive:  NOOBS_v2_8_2.zip
  inflating: recovery.rfs
  inflating: INSTRUCTIONS-README.txt
   creating: defaults/
   creating: defaults/slides/
  inflating: defaults/slides/A.png
  inflating: bcm2710-rpi-3-b-plus.dtb
  inflating: recovery.img
  inflating: bcm2708-rpi-0-w.dtb
   creating: os/
   creating: os/LibreELEC_RPi2/
  inflating: os/LibreELEC_RPi2/partitions.json
  inflating: os/LibreELEC_RPi2/release_notes.txt
 extracting: os/LibreELEC_RPi2/Storage.tar.xz
   creating: os/LibreELEC_RPi2/slides_vga/
  inflating: os/LibreELEC_RPi2/slides_vga/C.png
  inflating: os/LibreELEC_RPi2/slides_vga/D.png
  inflating: os/LibreELEC_RPi2/slides_vga/noobs_vga.psd
  inflating: os/LibreELEC_RPi2/slides_vga/E.png
  inflating: os/LibreELEC_RPi2/slides_vga/B.png
  inflating: os/LibreELEC_RPi2/slides_vga/A.png
  inflating: os/LibreELEC_RPi2/System.tar.xz
  inflating: os/LibreELEC_RPi2/os.json
  inflating: os/LibreELEC_RPi2/README.md
   creating: os/LibreELEC_RPi2/slides/
  inflating: os/LibreELEC_RPi2/slides/noobs.psd
  inflating: os/LibreELEC_RPi2/slides/D.png
  inflating: os/LibreELEC_RPi2/slides/C.png
  inflating: os/LibreELEC_RPi2/slides/B.png
  inflating: os/LibreELEC_RPi2/slides/E.png
  inflating: os/LibreELEC_RPi2/slides/A.png
 extracting: os/LibreELEC_RPi2/LibreELEC_RPi2.png
  inflating: os/LibreELEC_RPi2/partition_setup.sh
   creating: os/LibreELEC_RPi/
  inflating: os/LibreELEC_RPi/release_notes.txt
   creating: os/LibreELEC_RPi/slides_vga/
  inflating: os/LibreELEC_RPi/slides_vga/A.png
  inflating: os/LibreELEC_RPi/slides_vga/E.png
  inflating: os/LibreELEC_RPi/slides_vga/B.png
  inflating: os/LibreELEC_RPi/slides_vga/noobs_vga.psd
  inflating: os/LibreELEC_RPi/slides_vga/C.png
  inflating: os/LibreELEC_RPi/slides_vga/D.png
   creating: os/LibreELEC_RPi/slides/
  inflating: os/LibreELEC_RPi/slides/C.png
  inflating: os/LibreELEC_RPi/slides/D.png
  inflating: os/LibreELEC_RPi/slides/E.png
  inflating: os/LibreELEC_RPi/slides/B.png
  inflating: os/LibreELEC_RPi/slides/noobs.psd
  inflating: os/LibreELEC_RPi/slides/A.png
  inflating: os/LibreELEC_RPi/README.md
  inflating: os/LibreELEC_RPi/partition_setup.sh
  inflating: os/LibreELEC_RPi/System.tar.xz
  inflating: os/LibreELEC_RPi/partitions.json
 extracting: os/LibreELEC_RPi/LibreELEC_RPi.png
 extracting: os/LibreELEC_RPi/Storage.tar.xz
  inflating: os/LibreELEC_RPi/os.json
   creating: os/Raspbian/
 extracting: os/Raspbian/Raspbian.png
  inflating: os/Raspbian/boot.tar.xz
  inflating: os/Raspbian/partition_setup.sh
   creating: os/Raspbian/slides_vga/
  inflating: os/Raspbian/slides_vga/C.png
  inflating: os/Raspbian/slides_vga/D.png
  inflating: os/Raspbian/slides_vga/E.png
  inflating: os/Raspbian/slides_vga/B.png
  inflating: os/Raspbian/slides_vga/A.png
  inflating: os/Raspbian/slides_vga/F.png
  inflating: os/Raspbian/slides_vga/G.png
  inflating: os/Raspbian/release_notes.txt
  inflating: os/Raspbian/partitions.json
  inflating: os/Raspbian/root.tar.xz
  inflating: os/Raspbian/os.json
  inflating: recovery.cmdline
  inflating: bootcode.bin
  inflating: recovery7.img
  inflating: recovery.elf
 extracting: RECOVERY_FILES_DO_NOT_EDIT
  inflating: bcm2708-rpi-b-plus.dtb
  inflating: riscos-boot.bin
  inflating: bcm2709-rpi-2-b.dtb
  inflating: bcm2708-rpi-b.dtb
  inflating: bcm2710-rpi-cm3.dtb
  inflating: bcm2708-rpi-cm.dtb
  inflating: bcm2710-rpi-3-b.dtb
  inflating: BUILD-DATA
   creating: overlays/
  inflating: overlays/gpio-ir-tx.dtbo
  inflating: overlays/i2c-mux.dtbo
  inflating: overlays/w1-gpio-pullup.dtbo
  inflating: overlays/justboom-digi.dtbo
  inflating: overlays/mbed-dac.dtbo
  inflating: overlays/rpi-tv.dtbo
  inflating: overlays/spi2-1cs.dtbo
  inflating: overlays/mcp2515-can0.dtbo
  inflating: overlays/justboom-dac.dtbo
  inflating: overlays/midi-uart0.dtbo
  inflating: overlays/smi.dtbo
  inflating: overlays/spi1-2cs.dtbo
  inflating: overlays/at86rf233.dtbo
  inflating: overlays/dpi24.dtbo
  inflating: overlays/pisound.dtbo
  inflating: overlays/i2c-gpio.dtbo
  inflating: overlays/iqaudio-digi-wm8804-audio.dtbo
  inflating: overlays/spi-rtc.dtbo
  inflating: overlays/sc16is750-i2c.dtbo
  inflating: overlays/rpi-ft5406.dtbo
  inflating: overlays/spi2-3cs.dtbo
  inflating: overlays/vc4-kms-v3d.dtbo
  inflating: overlays/w1-gpio.dtbo
  inflating: overlays/dwc2.dtbo
  inflating: overlays/rpi-dac.dtbo
  inflating: overlays/ads1115.dtbo
  inflating: overlays/goodix.dtbo
  inflating: overlays/hifiberry-digi-pro.dtbo
  inflating: overlays/fe-pi-audio.dtbo
  inflating: overlays/exc3000.dtbo
  inflating: overlays/spi-gpio35-39.dtbo
  inflating: overlays/hy28a.dtbo
  inflating: overlays/dionaudio-loco.dtbo
  inflating: overlays/tinylcd35.dtbo
  inflating: overlays/adau1977-adc.dtbo
  inflating: overlays/mcp23017.dtbo
  inflating: overlays/i2c0-bcm2708.dtbo
  inflating: overlays/gpio-poweroff.dtbo
  inflating: overlays/mz61581.dtbo
  inflating: overlays/qca7000.dtbo
  inflating: overlays/i2c-pwm-pca9685a.dtbo
  inflating: overlays/mpu6050.dtbo
  inflating: overlays/enc28j60.dtbo
  inflating: overlays/i2c1-bcm2708.dtbo
  inflating: overlays/spi0-hw-cs.dtbo
  inflating: overlays/pitft35-resistive.dtbo
  inflating: overlays/rpi-proto.dtbo
  inflating: overlays/hifiberry-digi.dtbo
  inflating: overlays/allo-piano-dac-plus-pcm512x-audio.dtbo
  inflating: overlays/sc16is752-spi1.dtbo
  inflating: overlays/piscreen2r.dtbo
  inflating: overlays/audioinjector-addons.dtbo
  inflating: overlays/allo-boss-dac-pcm512x-audio.dtbo
  inflating: overlays/mcp2515-can1.dtbo
  inflating: overlays/media-center.dtbo
  inflating: overlays/papirus.dtbo
  inflating: overlays/midi-uart1.dtbo
  inflating: overlays/dpi18.dtbo
  inflating: overlays/upstream-aux-interrupt.dtbo
  inflating: overlays/i2c-rtc.dtbo
  inflating: overlays/mcp3202.dtbo
  inflating: overlays/gpio-key.dtbo
  inflating: overlays/i2c-rtc-gpio.dtbo
  inflating: overlays/audremap.dtbo
  inflating: overlays/sc16is752-i2c.dtbo
  inflating: overlays/raspidac3.dtbo
  inflating: overlays/uart0.dtbo
  inflating: overlays/README
  inflating: overlays/smi-dev.dtbo
  inflating: overlays/allo-piano-dac-pcm512x-audio.dtbo
  inflating: overlays/hifiberry-amp.dtbo
  inflating: overlays/upstream.dtbo
  inflating: overlays/smi-nand.dtbo
  inflating: overlays/rpi-backlight.dtbo
  inflating: overlays/sdtweak.dtbo
  inflating: overlays/adau7002-simple.dtbo
  inflating: overlays/sx150x.dtbo
  inflating: overlays/dht11.dtbo
  inflating: overlays/rpi-display.dtbo
  inflating: overlays/bmp085_i2c-sensor.dtbo
  inflating: overlays/pitft22.dtbo
  inflating: overlays/applepi-dac.dtbo
  inflating: overlays/mcp23s17.dtbo
  inflating: overlays/gpio-ir.dtbo
  inflating: overlays/mmc.dtbo
  inflating: overlays/pwm.dtbo
  inflating: overlays/pwm-ir-tx.dtbo
  inflating: overlays/mcp3008.dtbo
  inflating: overlays/iqaudio-dac.dtbo
  inflating: overlays/pibell.dtbo
  inflating: overlays/enc28j60-spi2.dtbo
  inflating: overlays/pwm-2chan.dtbo
  inflating: overlays/dionaudio-loco-v2.dtbo
  inflating: overlays/hifiberry-dacplus.dtbo
  inflating: overlays/pi3-miniuart-bt.dtbo
  inflating: overlays/allo-digione.dtbo
  inflating: overlays/ads7846.dtbo
  inflating: overlays/akkordion-iqdacplus.dtbo
  inflating: overlays/rpi-cirrus-wm5102.dtbo
  inflating: overlays/spi1-3cs.dtbo
  inflating: overlays/wittypi.dtbo
  inflating: overlays/rra-digidac1-wm8741-audio.dtbo
  inflating: overlays/vga666.dtbo
  inflating: overlays/pi3-disable-wifi.dtbo
  inflating: overlays/audioinjector-wm8731-audio.dtbo
  inflating: overlays/lirc-rpi.dtbo
  inflating: overlays/i2s-gpio28-31.dtbo
  inflating: overlays/gpio-shutdown.dtbo
  inflating: overlays/sdio.dtbo
  inflating: overlays/superaudioboard.dtbo
  inflating: overlays/i2c-bcm2708.dtbo
  inflating: overlays/spi1-1cs.dtbo
  inflating: overlays/ads1015.dtbo
  inflating: overlays/rpi-sense.dtbo
  inflating: overlays/spi2-2cs.dtbo
  inflating: overlays/rotary-encoder.dtbo
  inflating: overlays/hy28b.dtbo
  inflating: overlays/spi0-cs.dtbo
  inflating: overlays/vc4-fkms-v3d.dtbo
  inflating: overlays/i2c-sensor.dtbo
  inflating: overlays/uart1.dtbo
  inflating: overlays/pitft28-resistive.dtbo
  inflating: overlays/jedec-spi-nor.dtbo
  inflating: overlays/pitft28-capacitive.dtbo
  inflating: overlays/pps-gpio.dtbo
  inflating: overlays/iqaudio-dacplus.dtbo
  inflating: overlays/sdhost.dtbo
  inflating: overlays/sdio-1bit.dtbo
  inflating: overlays/hifiberry-dac.dtbo
  inflating: overlays/pi3-act-led.dtbo
  inflating: overlays/googlevoicehat-soundcard.dtbo
  inflating: overlays/piscreen.dtbo
  inflating: overlays/pi3-disable-bt.dtbo
  inflating: overlays/dwc-otg.dtbo
$
$ ls -la🆑
total 1576312
drwxr-xr-x   24 ujpadmin staff        768  8 29 23:17 .
drwx------+  29 ujpadmin staff        928  8 29 23:17 ..
-rw-rw-r--    1 ujpadmin staff        303  4 18 17:19 BUILD-DATA
-rw-rw-r--    1 ujpadmin staff       2356  4 18 17:18 INSTRUCTIONS-README.txt
-rw-r--r--    1 ujpadmin staff 1578581326  6 28 23:20 NOOBS_v2_8_2.zip
-rw-rw-r--    1 ujpadmin staff          0  4 18 17:19 RECOVERY_FILES_DO_NOT_EDIT
-rw-rw-r--    1 ujpadmin staff      22264  4 18 17:19 bcm2708-rpi-0-w.dtb
-rw-rw-r--    1 ujpadmin staff      22020  4 18 17:19 bcm2708-rpi-b-plus.dtb
-rw-rw-r--    1 ujpadmin staff      21761  4 18 17:19 bcm2708-rpi-b.dtb
-rw-rw-r--    1 ujpadmin staff      21474  4 18 17:19 bcm2708-rpi-cm.dtb
-rw-rw-r--    1 ujpadmin staff      23044  4 18 17:19 bcm2709-rpi-2-b.dtb
-rw-rw-r--    1 ujpadmin staff      24503  4 18 17:19 bcm2710-rpi-3-b-plus.dtb
-rw-rw-r--    1 ujpadmin staff      24240  4 18 17:19 bcm2710-rpi-3-b.dtb
-rw-rw-r--    1 ujpadmin staff      22952  4 18 17:19 bcm2710-rpi-cm3.dtb
-rw-r--r--    1 ujpadmin staff      52064  4 18 17:19 bootcode.bin
drwxrwxr-x    3 ujpadmin staff         96  3 14 17:37 defaults
drwxr-xr-x    5 ujpadmin staff        160  6 28 02:30 os
drwxrwxr-x  136 ujpadmin staff       4352  4 18 17:18 overlays
-rw-r--r--    1 ujpadmin staff         99  4 18 17:19 recovery.cmdline
-rw-r--r--    1 ujpadmin staff     673444  4 18 17:19 recovery.elf
-rwxrwxr-x    1 ujpadmin staff    2987384  4 18 17:19 recovery.img
-rw-r--r--    1 ujpadmin staff   28565504  4 18 17:19 recovery.rfs
-rwxrwxr-x    1 ujpadmin staff    3052536  4 18 17:19 recovery7.img
-rw-rw-r--    1 ujpadmin staff       9728  4 18 17:18 riscos-boot.bin
$
$ diskutil list🆑
/dev/disk0 (internal, physical):
   #:                       TYPE NAME                    SIZE       IDENTIFIER
   0:      GUID_partition_scheme                        *1.0 TB     disk0
   1:                        EFI EFI                     209.7 MB   disk0s1
   2:                 Apple_APFS Container disk1         1.0 TB     disk0s2

/dev/disk1 (synthesized):
   #:                       TYPE NAME                    SIZE       IDENTIFIER
   0:      APFS Container Scheme -                      +1.0 TB     disk1
                                 Physical Store disk0s2
   1:                APFS Volume Macintosh HD            560.8 GB   disk1s1
   2:                APFS Volume Preboot                 21.8 MB    disk1s2
   3:                APFS Volume Recovery                519.5 MB   disk1s3
   4:                APFS Volume VM                      2.1 GB     disk1s4

/dev/disk2 (external, physical):
   #:                       TYPE NAME                    SIZE       IDENTIFIER
   0:      GUID_partition_scheme                        *6.0 TB     disk2
   1:                        EFI EFI                     209.7 MB   disk2s1
   2:                  Apple_HFS Media6TB                6.0 TB     disk2s2

/dev/disk3 (internal, physical):🈁
   #:                       TYPE NAME                    SIZE       IDENTIFIER
   0:     FDisk_partition_scheme                        *31.7 GB    disk3
   1:             Windows_FAT_16 RECOVERY                3.1 GB     disk3s1
   2:                      Linux                         33.6 MB    disk3s5
   3:             Windows_FAT_32 boot                    69.2 MB    disk3s6
   4:                      Linux                         28.5 GB    disk3s7

$
$ diskutil eraseDisk FAT32 RP3 /dev/disk3🆑
Started erase on disk3
Unmounting disk
Creating the partition map
Waiting for partitions to activate
Formatting disk3s2 as MS-DOS (FAT32) with name RP3
512 bytes per physical sector
/dev/rdisk3s2: 61504128 sectors in 1922004 FAT32 clusters (16384 bytes/cluster)
bps=512 spc=32 res=32 nft=2 mid=0xf8 spt=32 hds=255 hid=411648 drv=0x80 bsec=61534208
 bspf=15016 rdcl=2 infs=1 bkbs=6
Mounting disk
Finished erase on disk3
$
$ ls -la /Volumes/RP3🆑
total 48
drwxrwxrwx  1 ujpadmin staff 16384  8 29 23:57 .
drwxr-xr-x+ 5 root    wheel   160  8 30 00:14 ..
drwxrwxrwx  1 ujpadmin staff 16384  8 29 23:57 .Spotlight-V100
drwxrwxrwx  1 ujpadmin staff 16384  8 30 00:14 .fseventsd
$
$ cp -R * /Volumes/RP3/.🆑
$
東急ハンズをうろうろしていて急に思い立った.ここにあるネジでRaspberry Pi3用の無骨なケースを作ることができるのではなかろうかと.

M2.6の小ネジ8本95円とゴム底鋲 F30NO.113円,アクリル平板300円,500円程度.ラズパイにはネジの穴が4箇所に空いているのだけれど,ここに通そうと思ったらM2.6という規格になるそうだ.東急ハンズの店頭で取り扱われていた中で一番小さい.(もっと小さいのはサイズが書いてないのがあったが)
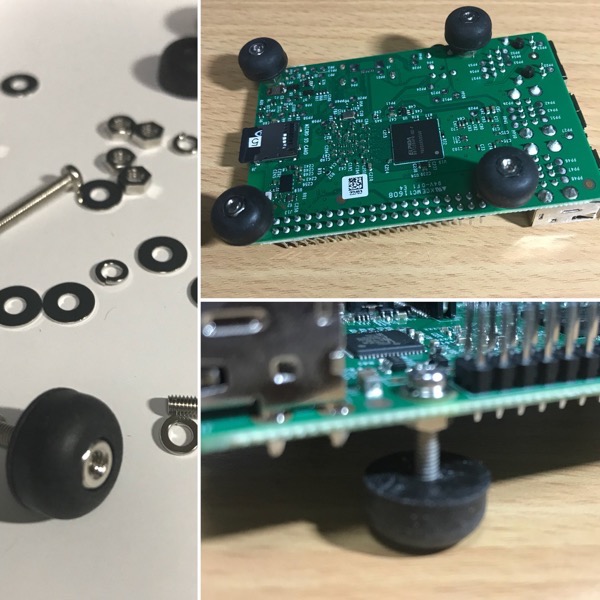
ゴムの鋲についてはサイズが書かれてなかったけれど,目測で英屋で選んでセットしたらぴったりでした.
ネジは一番長い15mmサイズだったのだけれど,冷却のための空気を通すのにちょうど良い程度の底上げができていると思う.あとは,アクリル板に穴を開けてセットすれば良いのだけれど,穴を開ける方法がわからないな...
M2.6の小ネジ8本95円とゴム底鋲 F30NO.113円,アクリル平板300円,500円程度.ラズパイにはネジの穴が4箇所に空いているのだけれど,ここに通そうと思ったらM2.6という規格になるそうだ.東急ハンズの店頭で取り扱われていた中で一番小さい.(もっと小さいのはサイズが書いてないのがあったが)
ゴムの鋲についてはサイズが書かれてなかったけれど,目測で英屋で選んでセットしたらぴったりでした.
ネジは一番長い15mmサイズだったのだけれど,冷却のための空気を通すのにちょうど良い程度の底上げができていると思う.あとは,アクリル板に穴を開けてセットすれば良いのだけれど,穴を開ける方法がわからないな...
PHPを入れているのにデフォルトアクセスがindex.htmlになるので,これをindex.phpに変更する.
設定されているファイルはこれ.
次のように変更.
設定されているファイルはこれ.
root@commet:/etc/apache2# cat mods-available/dir.conf🆑
<IfModule mod_dir.c>
	DirectoryIndex index.html index.cgi index.pl index.php index.xhtml index.htm
</IfModule>

# vim: syntax=apache ts=4 sw=4 sts=4 sr noet
root@commet:/etc/apache2#
デフォルトでは/usr/shareが参照可能のようなことになっているが,普通は不要なので消す.
root@commet:/etc/apache2# diff -d apache2.conf.20171019 apache2.conf🆑
159,162c159,163
< <Directory /usr/share>
< 	AllowOverride None
< 	Require all granted
< </Directory>
---
> #20171019 comment out🈁
> #<Directory /usr/share>
> #	AllowOverride None
> #	Require all granted
> #</Directory>
root@commet:/etc/apache2#
Raspberry Pi3でApache2をセットアップしていたらauthz_core:error AH01630: client denied by server configurationというのがでた
- カテゴリ :
- PC » Raspberry Pi
- ブロガー :
- ujpblog 2017/10/19 0:37
セットアップしてコンテンツを配置して観たのだけれど,エラーがでる.画面上はこう.
そしてアクセスログには,このようにでている.
Raspbian(Debian)のApache2ではデフォルトでは/var/wwwにコンテンツを配置しているが,それを/wwwディレクトリに移動したのだけれど,それが機嫌を損ねた原因.
次のようにDirectoryディレクティブでAllowOverrideを追加してあげれば良いです.
このdiffからじゃ分かりにくいけれど,/var/www/を削除して/www/にしているわけです.その後apachectl stop;sleep 5;apachectl startで再開.
Forbidden

You don't have permission to access /index.php on this server.
Apache/2.4.10 (Raspbian) Server at test.ujp.jp Port 80
[Thu Oct 19 00:23:09.782149 2017] [authz_core:error] [pid 3924] [client
192.168.20.35:52275] AH01630: client denied by server configuration: /www/htdocs/
次のようにDirectoryディレクティブでAllowOverrideを追加してあげれば良いです.
root@commet:/etc/apache2# diff -d apache2.conf.20171018a apache2.conf🆑
164c164,172
< <Directory /var/www/>
---
> #20171019 comment out
> #<Directory /var/www/>
> #	Options Indexes FollowSymLinks
> #	AllowOverride None
> #	Require all granted
> #</Directory>
>
> #20171019 add
> <Directory /www/>
root@commet:/etc/apache2#
Raspberry Pi3でApache2の設定,apache2.confとa2ensiteとa2dissite
- カテゴリ :
- PC » Raspberry Pi
- ブロガー :
- ujpblog 2017/10/18 21:44
Raspberry PiのRaspbian OSはDebianの派生ですが,そのaptでインストールされるApache2は設定ファイルがhttpd.confじゃなくapache2.confである事以外にも,独自のルールがある模様.
apache2.conf
メインとなるのがこのファイル.パスはこちら.
コメントと空白行を取り除いて設定ファイルをリストして見る.
apache2.conf
メインとなるのがこのファイル.パスはこちら.
/etc/apache2/apache2.conf
パッケージのアップグレード完了後,残りがないか確認する.
再度,パッケージリストを更新.
新しいパッケージリストによってアップグレード対象があるか確認.
とりあえずこれで最新となった模様.
pi@commet:~ $ sudo apt-get upgrade🆑
パッケージリストを読み込んでいます... 完了
依存関係ツリーを作成しています
状態情報を読み取っています... 完了
アップグレードパッケージを検出しています ... 完了
アップグレード: 0 個、新規インストール: 0 個、削除: 0 個、保留: 0 個。
pi@commet:~ $
pi@commet:~ $ sudo apt-get update🆑
取得:1 http://mirrordirector.raspbian.org jessie InRelease [14.9 kB]
ヒット http://archive.raspberrypi.org jessie InRelease
取得:2 http://mirrordirector.raspbian.org jessie/main armhf Packages [9,536 kB]
ヒット http://archive.raspberrypi.org jessie/main armhf Packages
ヒット http://archive.raspberrypi.org jessie/ui armhf Packages
無視 http://archive.raspberrypi.org jessie/main Translation-ja_JP
無視 http://archive.raspberrypi.org jessie/main Translation-ja
無視 http://archive.raspberrypi.org jessie/main Translation-en
無視 http://archive.raspberrypi.org jessie/ui Translation-ja_JP
無視 http://archive.raspberrypi.org jessie/ui Translation-ja
無視 http://archive.raspberrypi.org jessie/ui Translation-en
取得:3 http://mirrordirector.raspbian.org jessie/contrib armhf Packages [43.3 kB]
取得:4 http://mirrordirector.raspbian.org jessie/non-free armhf Packages [84.2 kB]
取得:5 http://mirrordirector.raspbian.org jessie/rpi armhf Packages [1,356 B]
無視 http://mirrordirector.raspbian.org jessie/contrib Translation-ja_JP
無視 http://mirrordirector.raspbian.org jessie/contrib Translation-ja
無視 http://mirrordirector.raspbian.org jessie/contrib Translation-en
無視 http://mirrordirector.raspbian.org jessie/main Translation-ja_JP
無視 http://mirrordirector.raspbian.org jessie/main Translation-ja
無視 http://mirrordirector.raspbian.org jessie/main Translation-en
無視 http://mirrordirector.raspbian.org jessie/non-free Translation-ja_JP
無視 http://mirrordirector.raspbian.org jessie/non-free Translation-ja
無視 http://mirrordirector.raspbian.org jessie/non-free Translation-en
無視 http://mirrordirector.raspbian.org jessie/rpi Translation-ja_JP
無視 http://mirrordirector.raspbian.org jessie/rpi Translation-ja
無視 http://mirrordirector.raspbian.org jessie/rpi Translation-en
9,679 kB を 2分 13秒 で取得しました (72.3 kB/s)
パッケージリストを読み込んでいます... 完了
pi@commet:~ $
pi@commet:~ $ sudo apt-get upgrade🆑
パッケージリストを読み込んでいます... 完了
依存関係ツリーを作成しています
状態情報を読み取っています... 完了
アップグレードパッケージを検出しています ... 完了
アップグレード: 0 個、新規インストール: 0 個、削除: 0 個、保留: 0 個。
pi@commet:~ $
とりあえずやってみた.
ファイルをダウンロードしてパッケージのインストールが行われる.
pi@commet:~ $ sudo apt-get upgrade🆑
パッケージリストを読み込んでいます... 完了
依存関係ツリーを作成しています
状態情報を読み取っています... 完了
アップグレードパッケージを検出しています ... 完了
以下のパッケージはアップグレードされます:
  apache2 apache2-bin apache2-data apache2-utils bind9-host
  bluez-firmware curl debconf debconf-i18n debconf-utils
  firmware-atheros firmware-brcm80211 firmware-libertas
  firmware-ralink firmware-realtek gir1.2-gdkpixbuf-2.0 git git-man
  gnupg gpgv gtk2-engines-pixbuf libbind9-90 libc-ares2 libcurl3
  libcurl3-gnutls libdns-export100 libdns100 libdvdnav4 libgcrypt20
  libgd3 libgdk-pixbuf2.0-0 libgdk-pixbuf2.0-common
  libgnutls-deb0-28 libgnutls-openssl27 libgtk2.0-0 libgtk2.0-bin
  libgtk2.0-common libirs-export91 libisc-export95 libisc95
  libisccc90 libisccfg-export90 libisccfg90 liblwres90 libnss3
  libraw10 libsmbclient libsoup-gnome2.4-1 libsoup2.4-1 libtiff5
  libwbclient0 libxml2 nodered perl perl-base perl-modules
  pi-bluetooth python-gpiozero python3-gpiozero python3-thonny
  rpi-chromium-mods samba-common samba-libs wpasupplicant xarchiver
アップグレード: 65 個、新規インストール: 0 個、削除: 0 個、保留: 0 個。
51.0 MB のアーカイブを取得する必要があります。
この操作後に追加で 1,255 kB のディスク容量が消費されます。
続行しますか? [Y/n] y🆑
パッケージ本体を更新するには,apt-get upgradeコマンドを使う.
んー,51MBか.明日にしよう...
pi@commet:~ $ sudo apt-get upgrade🆑
パッケージリストを読み込んでいます... 完了
依存関係ツリーを作成しています
状態情報を読み取っています... 完了
アップグレードパッケージを検出しています ... 完了
以下のパッケージはアップグレードされます:
  apache2 apache2-bin apache2-data apache2-utils bind9-host
  bluez-firmware curl debconf debconf-i18n debconf-utils
  firmware-atheros firmware-brcm80211 firmware-libertas
  firmware-ralink firmware-realtek gir1.2-gdkpixbuf-2.0 git git-man
  gnupg gpgv gtk2-engines-pixbuf libbind9-90 libc-ares2 libcurl3
  libcurl3-gnutls libdns-export100 libdns100 libdvdnav4 libgcrypt20
  libgd3 libgdk-pixbuf2.0-0 libgdk-pixbuf2.0-common
  libgnutls-deb0-28 libgnutls-openssl27 libgtk2.0-0 libgtk2.0-bin
  libgtk2.0-common libirs-export91 libisc-export95 libisc95
  libisccc90 libisccfg-export90 libisccfg90 liblwres90 libnss3
  libraw10 libsmbclient libsoup-gnome2.4-1 libsoup2.4-1 libtiff5
  libwbclient0 libxml2 nodered perl perl-base perl-modules
  pi-bluetooth python-gpiozero python3-gpiozero python3-thonny
  rpi-chromium-mods samba-common samba-libs wpasupplicant xarchiver
アップグレード: 65 個、新規インストール: 0 個、削除: 0 個、保留: 0 個。
51.0 MB のアーカイブを取得する必要があります。
この操作後に追加で 1,255 kB のディスク容量が消費されます。
続行しますか? [Y/n] n
中断しました。
pi@commet:~ $
RaspberianはDebianの派生で,パッケージマネージャはAPT(Advanced Packaging Tool)を使っている.コマンドはapt-get.パッケージマネージャ用のリストを新しいものに更新する.
Raspberry Pi3に直接関係ないけどな.
ダンプファイルをそのままmysqlモニターにリダイレクトしてあげれば良いです.ここでいう RESTOREDBは,リストア先のデータベース.
pi@commet:/var/www/html $ mysql -uroot -ppassword -D RESTOREDB < dbdumpfile.sql🆑
pi@commet:/var/www/html $
1ヶ月ほど前にファームアップしたのだけれど,またコマンド打ってみた.
まずは現在のバージョン.
そしてrpi-updateコマンド実行.
リブートすると,4.9.48-v7+から4.9.56-v7+になる模様.
バージョンアップされました.
まずは現在のバージョン.
pi@commet:~ $ uname -a🆑
Linux commet 4.9.48-v7+ #1034 SMP Fri Sep 8 14:31:14 BST 2017 armv7l GNU/Linux
pi@commet:~ $
pi@commet:~ $ sudo rpi-update🆑
 *** Raspberry Pi firmware updater by Hexxeh, enhanced by AndrewS and Dom
 *** Performing self-update
 *** Relaunching after update
 *** Raspberry Pi firmware updater by Hexxeh, enhanced by AndrewS and Dom
#############################################################
This update bumps to rpi-4.9.y linux tree
Be aware there could be compatibility issues with some drivers
Discussion here:
https://www.raspberrypi.org/forums/viewtopic.php?f=29&t=167934
##############################################################
 *** Downloading specific firmware revision (this will take a few minutes)
  % Total    % Received % Xferd  Average Speed   Time    Time     Time  Current
                                 Dload  Upload   Total   Spent    Left  Speed
100   168    0   168    0     0     63      0 --:--:--  0:00:02 --:--:--    63
100 54.0M  100 54.0M    0     0  54291      0  0:17:24  0:17:24 --:--:-- 77806^@
 *** Updating firmware
 *** Updating kernel modules
 *** depmod 4.9.56-v7+
 *** depmod 4.9.56+
 *** Updating VideoCore libraries
 *** Using HardFP libraries
 *** Updating SDK
 *** Running ldconfig
 *** Storing current firmware revision
 *** Deleting downloaded files
 *** Syncing changes to disk
 *** If no errors appeared, your firmware was successfully updated to
e2d447bcb7a18a59d6a0ce590c75c469ba015f5e
 *** A reboot is needed to activate the new firmware
pi@commet:~ $
pi@commet:~ $ uname -a🆑
Linux commet 4.9.56-v7+ #1044 SMP Fri Oct 13 15:23:13 BST 2017 armv7l GNU/Linux
pi@commet:~ $
Raspberry PiにインストールしたApache php mysqlが連携されているか確認
- カテゴリ :
- PC » Raspberry Pi
- ブロガー :
- ujpblog 2017/10/17 23:57
PHPからMySQLに接続する設定を特にしてないけれど,必要なパッケージを入れたので,データベースに接続できるか確認するプログラムをPHPで作成して接続してみる.
まずはディレクトリ移動.
こんなファイルを作る.ユーザIDとパスワードはそれな理に設定を.
コードをそのままコマンドラインで実行して見る.
Good job!
そのままブラウザでもアクセスして見る.
http://ipaddress/dbconnect.php
同様にConnected successfullyとでれば成功.
まずはディレクトリ移動.
pi@commet:~ $ cd /var/www/html🆑
pi@commet:/var/www/html $
pi@commet:/var/www/html $ cat dbconnect.php🆑
<?php
   $link = mysql_connect("localhost", "root", "password")
       or die("Could not connect¥n");
   print ("Connected successfully¥n");
   mysql_close($link);
?>
pi@commet:/var/www/html $
pi@commet:/var/www/html $ php dbconnect.php🆑
Connected successfully
pi@commet:/var/www/html $
そのままブラウザでもアクセスして見る.
http://ipaddress/dbconnect.php
同様にConnected successfullyとでれば成功.
raspberry Piに前回,MySQLをインストールしたので,管理ユーザのrootにパスワード設定を行ってみる.
まずは,パスワードなしでrootユーザで接続できることを確認.
パスワードなしでログインできた.パスワードを設定する.
まずはMySQLから一旦接続を切る.
管理用のコマンドラインツールを確認.
mysqladminツールでパスワードを設定.
ここではnew-passwordというパスワードを設定している.もう一度先ほどと同じようにrootユーザで接続して見る.
パスワードを設定したからか,アクセス拒否される. -pオプションを使ってパスワードを指定する
設定したパスワードを入力する.
繋がりました.
まずは,パスワードなしでrootユーザで接続できることを確認.
pi@commet:~ $ mysql -uroot🆑
Welcome to the MySQL monitor.  Commands end with ; or \g.
Your MySQL connection id is 42
Server version: 5.5.57-0+deb8u1 (Raspbian)

Copyright (c) 2000, 2017, Oracle and/or its affiliates. All rights reserved.

Oracle is a registered trademark of Oracle Corporation and/or its
affiliates. Other names may be trademarks of their respective
owners.

Type 'help;' or '\h' for help. Type '\c' to clear the current input statement.

mysql>
まずはMySQLから一旦接続を切る.
mysql> quit🆑
Bye
pi@commet:~ $
pi@commet:~ $ which mysqladmin🆑
/usr/bin/mysqladmin
pi@commet:~ $
pi@commet:~ $ /usr/bin/mysqladmin -u root password 'new-password'🆑
pi@commet:~ $
pi@commet:~ $ mysql -uroot🆑
ERROR 1045 (28000): Access denied for user 'root'@'localhost' (using password: NO)
pi@commet:~ $
pi@commet:~ $ mysql -uroot -p🆑
Enter password:🆑
Welcome to the MySQL monitor.  Commands end with ; or \g.
Your MySQL connection id is 45
Server version: 5.5.57-0+deb8u1 (Raspbian)

Copyright (c) 2000, 2017, Oracle and/or its affiliates. All rights reserved.

Oracle is a registered trademark of Oracle Corporation and/or its
affiliates. Other names may be trademarks of their respective
owners.

Type 'help;' or '\h' for help. Type '\c' to clear the current input statement.

mysql>
デフォルトでは/var/wwwがDocumentRootだというので,何が入っているか移動して確認する.
さらにhtmlディレクトリ配下を確認.
index.htmlをバックアップして,Helloという文字だけのファイルを作成.
これで,デフォルトページにアクセスすると,Helloと表示される.
http://ipaddress/index.html
次に,PHPが動作するか確認する.こんなファイルを作成.
http://ipaddress/index.phpにアクセス
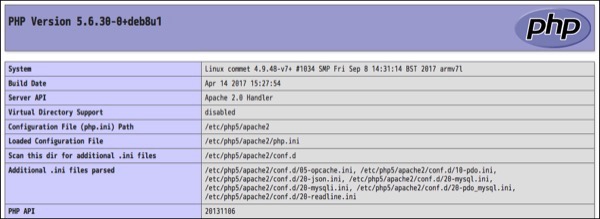
これで動作していることが確認できた.
root@commet:~# cd /var/www🆑
root@commet:/var/www# ls -la🆑
合計 12
drwxr-xr-x  3 root root 4096  9月 13 01:14 .
drwxr-xr-x 12 root root 4096  9月 13 01:14 ..
drwxr-xr-x  2 root root 4096  9月 13 01:15 html🈁
root@commet:/var/www#
root@commet:/var/www# cd html🆑
root@commet:/var/www/html# ls -la🆑
合計 20
drwxr-xr-x 2 root root  4096  9月 13 01:15 .
drwxr-xr-x 3 root root  4096  9月 13 01:14 ..
-rw-r--r-- 1 root root 10701  9月 13 01:15 index.html🈁
root@commet:/var/www/html#
root@commet:/var/www/html# mv index.html index.html.org🆑
root@commet:/var/www/html# ls -la🆑
合計 20
drwxr-xr-x 2 root root  4096  9月 26 00:59 .
drwxr-xr-x 3 root root  4096  9月 13 01:14 ..
-rw-r--r-- 1 root root 10701  9月 13 01:15 index.html.org🈁
root@commet:/var/www/html# echo Hello > index.html🆑
root@commet:/var/www/html# ls -la🆑
合計 24
drwxr-xr-x 2 root root  4096  9月 26 01:00 .
drwxr-xr-x 3 root root  4096  9月 13 01:14 ..
-rw-r--r-- 1 root root     6  9月 26 01:00 index.html🈁
-rw-r--r-- 1 root root 10701  9月 13 01:15 index.html.org🈁
root@commet:/var/www/html#
http://ipaddress/index.html
次に,PHPが動作するか確認する.こんなファイルを作成.
root@commet:/var/www/html# cat index.php
<?php
  phpinfo();
?>
root@commet:/var/www/html#
これで動作していることが確認できた.
PHPからMySQLにアクセスするためのライブラリ群をインストール.
libapache2-mod-php5もインストールされる.
root@commet:/home/pi# sudo apt-get install php5-mysql
パッケージリストを読み込んでいます... 完了
依存関係ツリーを作成しています
状態情報を読み取っています... 完了
以下のパッケージが新たにインストールされます:
  php5-mysql
アップグレード: 0 個、新規インストール: 1 個、削除: 0 個、保留: 52 個。
52.2 kB のアーカイブを取得する必要があります。
この操作後に追加で 191 kB のディスク容量が消費されます。
取得:1 http://mirrordirector.raspbian.org/raspbian/ jessie/main php5-mysql armhf 5.6.30+dfsg-0+deb8u1 [52.2 kB]
52.2 kB を 2秒 で取得しました (25.3 kB/s)
以前に未選択のパッケージ php5-mysql を選択しています。
(データベースを読み込んでいます ... 現在 116723 個のファイルとディレクトリがインストールされています。)
.../php5-mysql_5.6.30+dfsg-0+deb8u1_armhf.deb を展開する準備をしています ...
php5-mysql (5.6.30+dfsg-0+deb8u1) を展開しています...
libapache2-mod-php5 (5.6.30+dfsg-0+deb8u1) のトリガを処理しています ...
php5-mysql (5.6.30+dfsg-0+deb8u1) を設定しています ...

Creating config file /etc/php5/mods-available/mysql.ini with new version
php5_invoke: Enable module mysql for apache2 SAPI
php5_invoke: Enable module mysql for cli SAPI

Creating config file /etc/php5/mods-available/mysqli.ini with new version
php5_invoke: Enable module mysqli for apache2 SAPI
php5_invoke: Enable module mysqli for cli SAPI

Creating config file /etc/php5/mods-available/pdo_mysql.ini with new version
php5_invoke: Enable module pdo_mysql for apache2 SAPI
php5_invoke: Enable module pdo_mysql for cli SAPI
libapache2-mod-php5 (5.6.30+dfsg-0+deb8u1) のトリガを処理しています ...
root@commet:/home/pi#
MySQLのサーバをインストールする.
mysql-clientが含まれていることを確認.
インストールを続ける.
root@commet:/home/pi# apt-get install mysql-server🆑
パッケージリストを読み込んでいます... 完了
依存関係ツリーを作成しています
状態情報を読み取っています... 完了
以下の追加パッケージがインストールされます:
  libaio1 libdbd-mysql-perl libdbi-perl libhtml-template-perl libmysqlclient18 libterm-readkey-perl mysql-client-5.5
  mysql-common mysql-server-5.5 mysql-server-core-5.5
提案パッケージ:
  libclone-perl libmldbm-perl libnet-daemon-perl libsql-statement-perl libipc-sharedcache-perl mailx tinyca
以下のパッケージが新たにインストールされます:
  libaio1 libdbd-mysql-perl libdbi-perl libhtml-template-perl libmysqlclient18 libterm-readkey-perl mysql-client-5.5
  mysql-common mysql-server mysql-server-5.5 mysql-server-core-5.5
アップグレード: 0 個、新規インストール: 11 個、削除: 0 個、保留: 52 個。
8,341 kB のアーカイブを取得する必要があります。
この操作後に追加で 89.4 MB のディスク容量が消費されます。
続行しますか? [Y/n] y🆑
インストールを続ける.
PHP5をインストールする.パッケージやライブラリのことはあまり考えず,最小限選択で.
各種開発言語用のライブラリはインストールされる模様.今回はこのままインストールする.lsofがインストールされるというのが気になるけどね.
そして続行する.
root@commet:/home/pi# sudo apt-get install php5🆑
パッケージリストを読み込んでいます... 完了
依存関係ツリーを作成しています
状態情報を読み取っています... 完了
以下の追加パッケージがインストールされます:
  libapache2-mod-php5 libonig2 libperl4-corelibs-perl libqdbm14 lsof php5-cli php5-common php5-json php5-readline
提案パッケージ:
  php-pear php5-user-cache
以下のパッケージが新たにインストールされます:
  libapache2-mod-php5 libonig2 libperl4-corelibs-perl libqdbm14 lsof php5 php5-cli php5-common php5-json php5-readline
アップグレード: 0 個、新規インストール: 10 個、削除: 0 個、保留: 52 個。
5,087 kB のアーカイブを取得する必要があります。
この操作後に追加で 18.8 MB のディスク容量が消費されます。
続行しますか? [Y/n] y🆑
そして続行する.
1年ほど前にファームアップしたのだけれど,その続き.
今現在は,こんな感じ.
4.9.35-v7+というバージョン.これをファームアップする.
15分ほどで4.9.35-v7+が4.9.48-v7+となった模様.再起動が必要.
ファームウェアのバージョンアップ完了.
今現在は,こんな感じ.
pi@commet:~ $ uname -a🆑
Linux commet 4.9.35-v7+ #1014 SMP Fri Jun 30 14:47:43 BST 2017 armv7l GNU/Linux
pi@commet:~ $
pi@commet:~ $ sudo rpi-update🆑
 *** Raspberry Pi firmware updater by Hexxeh, enhanced by AndrewS and Dom
 *** Performing self-update
  % Total    % Received % Xferd  Average Speed   Time    Time     Time  Current
                                 Dload  Upload   Total   Spent    Left  Speed
100 13403  100 13403    0     0  52838      0 --:--:-- --:--:-- --:--:-- 52976
 *** Relaunching after update
 *** Raspberry Pi firmware updater by Hexxeh, enhanced by AndrewS and Dom
 *** We're running for the first time
 *** Backing up files (this will take a few minutes)
 *** Backing up firmware
 *** Backing up modules 4.9.35-v7+
#############################################################
This update bumps to rpi-4.9.y linux tree
Be aware there could be compatibility issues with some drivers
Discussion here:
https://www.raspberrypi.org/forums/viewtopic.php?f=29&t=167934
##############################################################
 *** Downloading specific firmware revision (this will take a few minutes)
  % Total    % Received % Xferd  Average Speed   Time    Time     Time  Current
                                 Dload  Upload   Total   Spent    Left  Speed
100   168    0   168    0     0    257      0 --:--:-- --:--:-- --:--:--   257
100 54.1M  100 54.1M    0     0  61329      0  0:15:25  0:15:25 --:--:-- 64084
 *** Updating firmware
 *** Updating kernel modules
 *** depmod 4.9.48+
 *** depmod 4.9.48-v7+
 *** Updating VideoCore libraries
 *** Using HardFP libraries
 *** Updating SDK
 *** Running ldconfig
 *** Storing current firmware revision
 *** Deleting downloaded files
 *** Syncing changes to disk
 *** If no errors appeared, your firmware was successfully updated to 7aaa230e9680e43de3a231d320ab25d55815b95e
 *** A reboot is needed to activate the new firmware
pi@commet:~ $
pi@commet:~ $ uname -a🆑
Linux commet 4.9.48-v7+ #1034 SMP Fri Sep 8 14:31:14 BST 2017 armv7l GNU/Linux
pi@commet:~ $
Raspbian OSには,一般ユーザ権限のpiユーザとrootユーザが存在している.piユーザのパスワードはraspberryと決まっているので,危ないので変更する.
次にrootユーザのパスワードを変更.まずは,rootユーザにスイッチ.
パスワードが設定されてないので入力を求められない.rootユーザのパスワードを変更.
設定できました.
pi@raspberrypi:~ $ sudo passwd pi🆑
新しい UNIX パスワードを入力してください:XXXXXXXXXXXX🆑
新しい UNIX パスワードを再入力してください:XXXXXXXXXXX🆑
passwd: パスワードは正しく更新されました🈁
pi@raspberrypi:~ $
pi@raspberrypi:~ $ sudo su - root
root@raspberrypi:~#
root@raspberrypi:~# passwd root🆑
新しい UNIX パスワードを入力してください:yyyyyyyyyy🆑
新しい UNIX パスワードを再入力してください:yyyyyyyyyy🆑
passwd: パスワードは正しく更新されました🈁
root@raspberrypi:~#
今年の初めにも書いたのだけれど現在のRaspberry PiにインストールしたOS,RasobianではデフォルトでSSHDが有効ではないので,これを有効にする.
まずは,/boot/sshファイルがあるか確認.
ファイルがなかったので作成する.この時,sudoユーザで.最初はパスワードはついてない.
これでOSを再起動すれば良い.再起動後,MacからSSHで接続して見る.
piユーザのパスワードはraspberryなので,これは変更しなければならない.
まずは,/boot/sshファイルがあるか確認.
pi@raspberrypi:~ $ ls -la /boot/ssh🆑
ls: cannot access /boot/ssh: No such file or directory
pi@raspberrypi:~ $
pi@raspberrypi:~ $ sudo touch /boot/ssh🆑
pi@raspberrypi:~ $ ls -la /boot/ssh🆑
-rwxr-xr-x 1 root root 0 Jul 31 14:27 /boot/ssh
pi@raspberrypi:~ $
MBA13:~ ujpadmin$ ssh pi@192.168.20.241🆑
The authenticity of host '192.168.20.241 (192.168.20.241)' can't be established.
ECDSA key fingerprint is SHA256:IV5MCq/RvD+ge5ptTuDVDLGxixqVHvKugMxpvsMo3iU.
Are you sure you want to continue connecting (yes/no)? yes🆑
Warning: Permanently added '192.168.20.241' (ECDSA) to the list of known hosts.
pi@192.168.20.241's password:raspberry🆑

The programs included with the Debian GNU/Linux system are free software;
the exact distribution terms for each program are described in the
individual files in /usr/share/doc/*/copyright.

Debian GNU/Linux comes with ABSOLUTELY NO WARRANTY, to the extent
permitted by applicable law.
Last login: Mon Jul 31 15:44:54 2017 from 192.168.20.241

SSH is enabled and the default password for the 'pi' user has not been changed.
This is a security risk - please login as the 'pi' user and type 'passwd' to set a new password.

pi@raspberrypi:~ $
Raspberry Pi 3 Model BのOSを入手する sha2456でダウンロードファイルをチェック
- カテゴリ :
- PC » Raspberry Pi
- ブロガー :
- ujpblog 2017/7/29 12:58
けっきょく2時間程度かけてダウンロード.ファイルはこちら.
途中で切断されたりしたので,正しくダウンロードできたかチェックサムを確認.
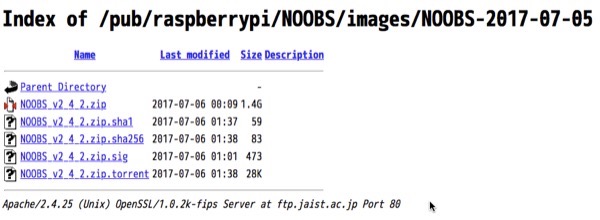
SHA256のチェックサムファイルがあるので,これをダウンロード.
チェックサムファイルの中身を確認.
shasumコマンドで,SHA 256を指定してチェック.
チェックサムが一致していることが確認できました.
MBA13:Downloads ujpadmin$ ls -la NOOBS_v2_4_2.zip
-rw-r--r-- 1 ujpadmin staff 1501645268  7  6 00:09 NOOBS_v2_4_2.zip
MBA13:Downloads ujpadmin $
SHA256のチェックサムファイルがあるので,これをダウンロード.
チェックサムファイルの中身を確認.
MBA13:Downloads ujpadmin $ cat NOOBS_v2_4_2.zip.sha256
253f166b862d5ddf0972610b197da4616760ad94c0fdb9fc8d5a1ebe5c5ffff3  NOOBS_v2_4_2.zip
MBA13:Downloads ujpadmin $
MBA13:Downloads ujpadmin $ shasum -a 256 NOOBS_v2_4_2.zip > sum.txt
MBA13:Downloads ujpadmin $ cat sum.txt
253f166b862d5ddf0972610b197da4616760ad94c0fdb9fc8d5a1ebe5c5ffff3  NOOBS_v2_4_2.zip
MBA13:Downloads ujpadmin $ diff NOOBS_v2_4_2.zip.sha256 sum.txt
MBA13:Downloads ujpadmin $
1年前に衝動的に買って初期セットアップが終わったと同時に放置していたRaspberry Piですが,再度セットアップチャレンジ.
OSの入手先はこちら.
NOOBS
https://www.raspberrypi.org/downloads/noobs/
ダウンロードページにアクセスするとこんな感じ.
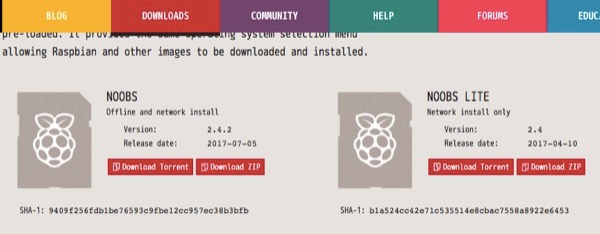
NOOBS LITEにすると残りのパッケージはネットワークインストールになるので,必要なものだけ入手なので効率的では,あると思うけれど,何度もインストールしたい気がするので,オフライン版を選択.オフライン版でも物によってはネットワーク経由になりますが.
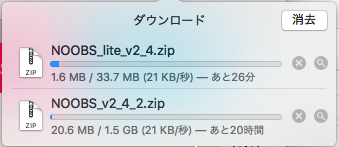
そしてやっぱりダウンロードは遅い.ミラーサイトで入手することに.
北陸先端科学技術大学院大学
http://ftp.jaist.ac.jp/pub/raspberrypi/NOOBS/images/NOOBS-2017-07-05/
FTPサイトと名乗っているだけれどHTTPでも接続可能.
ここからダウンロード.
スピード的には20倍!速い...
OSの入手先はこちら.
NOOBS
https://www.raspberrypi.org/downloads/noobs/
ダウンロードページにアクセスするとこんな感じ.
NOOBS LITEにすると残りのパッケージはネットワークインストールになるので,必要なものだけ入手なので効率的では,あると思うけれど,何度もインストールしたい気がするので,オフライン版を選択.オフライン版でも物によってはネットワーク経由になりますが.
そしてやっぱりダウンロードは遅い.ミラーサイトで入手することに.
北陸先端科学技術大学院大学
http://ftp.jaist.ac.jp/pub/raspberrypi/NOOBS/images/NOOBS-2017-07-05/
FTPサイトと名乗っているだけれどHTTPでも接続可能.
ここからダウンロード.
スピード的には20倍!速い...
久しぶりにRaspberry Pi 3を引っ張り出して再設定.設定して楽しもう〜と思っていた矢先に,マイブームがポケモンGOに移ってしまって,放置プレイのままでした.
心機一転.OSを新しくしてみた.Raspberry Pixelというらしい.名前は置いといて,SSHが起動しなくなっていた.rootユーザで/boot/sshファイルを作ってOS再起動すると,SSHDが起動します.
それ以外は同じかなぁ.
心機一転.OSを新しくしてみた.Raspberry Pixelというらしい.名前は置いといて,SSHが起動しなくなっていた.rootユーザで/boot/sshファイルを作ってOS再起動すると,SSHDが起動します.
touch /boot/ssh
apacheをインストールしてみる.
合計7MB.yを入力して続行.
ujpadmin@commet:~ $ sudo apt-get install apache2
パッケージリストを読み込んでいます... 完了
依存関係ツリーを作成しています
状態情報を読み取っています... 完了
以下の追加パッケージがインストールされます:
  apache2-bin apache2-data apache2-utils libapr1 libaprutil1
  libaprutil1-dbd-sqlite3 libaprutil1-ldap liblua5.1-0 ssl-cert
提案パッケージ:
  apache2-doc apache2-suexec-pristine apache2-suexec-custom openssl-blacklist
以下のパッケージが新たにインストールされます:
  apache2 apache2-bin apache2-data apache2-utils libapr1 libaprutil1
  libaprutil1-dbd-sqlite3 libaprutil1-ldap liblua5.1-0 ssl-cert
アップグレード: 0 個、新規インストール: 10 個、削除: 0 個、保留: 47 個。
1,747 kB のアーカイブを取得する必要があります。
この操作後に追加で 5,236 kB のディスク容量が消費されます。
続行しますか? [Y/n] y
apt-cache searchで探せる.今回はApacheを探してみた.
ujpadmin@commet:~ $ apt-cache search httpd|grep apache
apache2 - Apache HTTP Server
apache2-mpm-event - transitional event MPM package for apache2
apache2-mpm-itk - transitional itk MPM package for apache2
apache2-mpm-prefork - transitional prefork MPM package for apache2
apache2-mpm-worker - transitional worker MPM package for apache2
libapache2-mod-authn-sasl - SASL authentication backend provider for Apache
libapache2-mod-dnssd - Zeroconf support for Apache 2 via avahi
libapache2-mod-lookup-identity - Apache module to retrieve additional information about the authenticated user
libapache2-mod-mime-xattr - Apache2 module to get MIME info from filesystem extended attributes
libapache2-mod-netcgi-apache - OCaml application-level Internet libraries - netcgi2 Apache2 connector
libapache2-mod-proxy-msrpc - Apache module for Outlook Anywhere support in reverse proxy setups
libapache2-mod-rpaf - module for Apache2 which takes the last IP from the 'X-Forwarded-For' header
libapache2-mod-ruid2 - suexec module for Apache 2
libapache2-mod-svn - Apache Subversion server modules for Apache httpd
libapache2-mod-watchcat - Process monitoring Apache module
libapache2-mod-wsgi - Python WSGI adapter module for Apache
libapache2-mod-wsgi-py3 - Python 3 WSGI adapter module for Apache
libapache2-svn - Apache Subversion server modules for Apache httpd (dummy package)
ujpadmin@commet:~ $
インストールされているパッケージ一覧.
たとえば,sshに関するライブラリを検索.
dpkg -l
ujpadmin@commet:~ $ dpkg -l |grep ssh
ii  libssh-4:armhf       0.6.3-4+deb8u2     armhf   tiny C SSH library (OpenSSL flavor)
ii  libssh2-1:armhf      1.4.3-4.1+deb8u1   armhf   SSH2 client-side library
ii  openssh-client       1:6.7p1-5+deb8u2   armhf   secure shell (SSH) client, for secure access to remote machines
ii  openssh-server       1:6.7p1-5+deb8u2   armhf   secure shell (SSH) server, for secure access from remote machines
ii  openssh-sftp-server  1:6.7p1-5+deb8u2   armhf   secure shell (SSH) sftp server module, for SFTP access from remote machines
ii  ssh                  1:6.7p1-5+deb8u2   all     secure shell client and server (metapackage)
ujpadmin@commet:~
